JEEPTALK.net: CJ8 to M170 Conversion - JEEPTALK.net

Jump to content

  • 7 Pages +
  • 1
  • 2
  • 3
  • 4
  • Last »
  • You cannot start a new topic
  • You cannot reply to this topic

CJ8 to M170 Conversion

#31 User is offline   Jim B 

  • Commander
  • Group: GlobalMod
  • Posts: 8,692
  • Joined: 30-April 03
  • Gender:Male
  • Location:Davie, FL

  Posted 01 February 2006 - 08:46 AM

I'm glad all is going well. Start painting those gauges and get back to us on the paint thread on what you found out with Rapco. With regards to the spare tire bracket and shifting it to the outside, please post up a CAD drawing. :whistle: Btw, if it does not clear the body slightly you can make yourself a steel or wood spacer.

You are really going all out. :whistle:
Posted Image Posted Image
El Niņo
Experience is defined as something you get, after you need it.
Give the world the best you have. The best will come back to you...

There are no rules for good photographs, there are only good photographs.
"Thou shalt not bear false witness against thy neighbour." 9th Commandment.
"Speak not Evil of the absent for it is unjust." George Washington, Rule 89 of Civility and Decent Behavior.
Wheeling Gallery ----- E-Mail
Life Member: South Florida Jeep Club

#32 User is offline   Rollbar 

  • Commander
  • Group: GlobalMod
  • Posts: 7,058
  • Joined: 16-May 03
  • Gender:Male
  • Location:Palm Harbor, Florida

Posted 06 February 2006 - 04:03 PM

Well heres the front bumper & bumperets, the bumper is bent just a little but I'll replace maybe in the future------> Freeeebeeeee, nothing, nada. Next is the steering column, dash & axles.

Posted Image

Posted Image

Posted Image


Having fun spending $ :wub: :lol: :drive: :gun:
RollBar
*MY CJ IS YOUR yJ's DADDY*
'48 Willys; '74CJ5; '80CJ7; '84 CJ8; '86 CJ7

*Who Needs A Stinking Manual When You Have A Fat Wallet For Tech Support!*

*What man is a man who does not make the world better*

Support the Central Florida Bible Camp for kids

#33 User is offline   Rollbar 

  • Commander
  • Group: GlobalMod
  • Posts: 7,058
  • Joined: 16-May 03
  • Gender:Male
  • Location:Palm Harbor, Florida

Posted 07 February 2006 - 07:24 PM

Well my new stainless brake ($$) & fuel lines are here w/the clips. The $146.08 fuel line (w/clips) is (5/16") the darker looking stainless w/the blue caps on the ends. I just bought the line from the tank to the pump since I won't run a return line. I bought the fuel line from In-line tube & the brake lines from Quadra-Tec.

Posted Image

Getting there,
RollBar

P.S. All the other stuff (NOS parts, lights etc.) are in transit, I'll post pics when the stuff gets in.
*MY CJ IS YOUR yJ's DADDY*
'48 Willys; '74CJ5; '80CJ7; '84 CJ8; '86 CJ7

*Who Needs A Stinking Manual When You Have A Fat Wallet For Tech Support!*

*What man is a man who does not make the world better*

Support the Central Florida Bible Camp for kids

#34 User is offline   Rollbar 

  • Commander
  • Group: GlobalMod
  • Posts: 7,058
  • Joined: 16-May 03
  • Gender:Male
  • Location:Palm Harbor, Florida

Posted 08 February 2006 - 08:01 PM

Well the shovel w/bracket, side mirror w/bracket, rear view mirror (in box), Tail black outs & front black out lights, front lifting shackles w/pins, chains & mounting base & reflectors are in. YAAaaaaa. :whistle: :whistle:

Pics below:
Posted Image


Posted Image

RollBar
*MY CJ IS YOUR yJ's DADDY*
'48 Willys; '74CJ5; '80CJ7; '84 CJ8; '86 CJ7

*Who Needs A Stinking Manual When You Have A Fat Wallet For Tech Support!*

*What man is a man who does not make the world better*

Support the Central Florida Bible Camp for kids

#35 User is offline   Jim B 

  • Commander
  • Group: GlobalMod
  • Posts: 8,692
  • Joined: 30-April 03
  • Gender:Male
  • Location:Davie, FL

  Posted 08 February 2006 - 09:26 PM

Looking real good! :lol: 
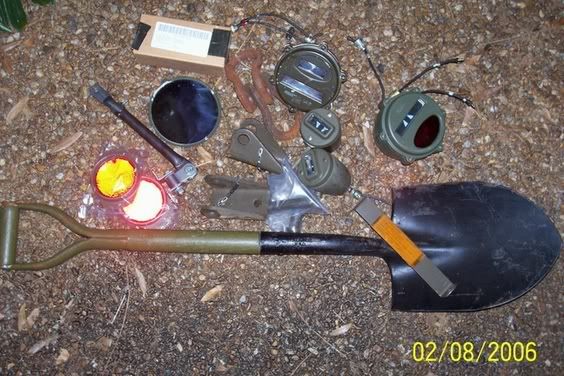
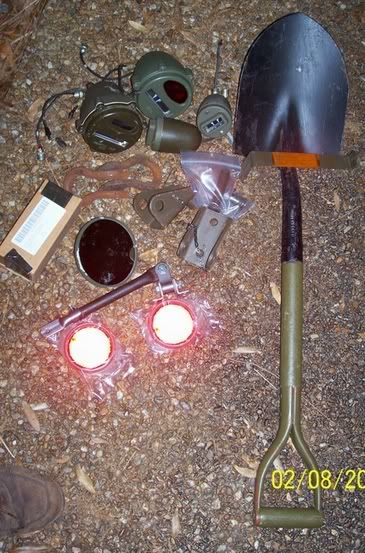
I can see the reflectors work! :whistle:

Tally up fellow Jeeper :down: :whistle:

Btw, we will be making raids with our vehicles, I'll tell you what kind later. :whistle: :whistle:
Posted Image Posted Image
El Niņo
Experience is defined as something you get, after you need it.
Give the world the best you have. The best will come back to you...

There are no rules for good photographs, there are only good photographs.
"Thou shalt not bear false witness against thy neighbour." 9th Commandment.
"Speak not Evil of the absent for it is unjust." George Washington, Rule 89 of Civility and Decent Behavior.
Wheeling Gallery ----- E-Mail
Life Member: South Florida Jeep Club

#36 User is offline   Rollbar 

  • Commander
  • Group: GlobalMod
  • Posts: 7,058
  • Joined: 16-May 03
  • Gender:Male
  • Location:Palm Harbor, Florida

Posted 08 February 2006 - 10:17 PM

I didn't realize the rear tail lights had that big of a back on them, I thought they were flat. They have two bolts that hold them on a bracket etc. Looks like I'm gonna have to cut a large hole in the body (I don't really want to) to mount them like factory, or, I could fasion/weld a bracket behind the rear panel & bolt them on. Hummmmm.

RollBar

P.S. All lights are 24Volt. The NOS shovel bracket is dated 1953. :whistle:
*MY CJ IS YOUR yJ's DADDY*
'48 Willys; '74CJ5; '80CJ7; '84 CJ8; '86 CJ7

*Who Needs A Stinking Manual When You Have A Fat Wallet For Tech Support!*

*What man is a man who does not make the world better*

Support the Central Florida Bible Camp for kids

#37 User is offline   Rollbar 

  • Commander
  • Group: GlobalMod
  • Posts: 7,058
  • Joined: 16-May 03
  • Gender:Male
  • Location:Palm Harbor, Florida

Posted 10 March 2006 - 06:27 PM

Well look what I just bought on eBay for $46.00/55.35 w/shipping.

Now I can realiy go underwater. For those of U who have K&N, :tongue1: :whistle: :cool1: j/k.

RollBar

P.S. I have to find or make a air filter for it now. Any ideas? :scratch:

Posted Image

Posted Image

Here is the sellers comments:
This is a very nice and straight M38A1 air cleaner. There are no dents and the paint appears to be pretty good. It needs to be cleaned off though. This one comes with all the parts you see attached to it in the pictures. The inside looks new. These are commonly missing from M38A1s but if you looking, I guess you know that.
I have a bunch of other M38 and M38A1 stuff up for auction, I'm cleaning out my parts collection since I just picked up a new toy and need the room.
*MY CJ IS YOUR yJ's DADDY*
'48 Willys; '74CJ5; '80CJ7; '84 CJ8; '86 CJ7

*Who Needs A Stinking Manual When You Have A Fat Wallet For Tech Support!*

*What man is a man who does not make the world better*

Support the Central Florida Bible Camp for kids

#38 User is offline   Jim B 

  • Commander
  • Group: GlobalMod
  • Posts: 8,692
  • Joined: 30-April 03
  • Gender:Male
  • Location:Davie, FL

  Posted 11 March 2006 - 10:10 AM

I guess his empty room becomes your full room. :scratch: Darn Rollbar, looking real good as I know how you can actually make that look. :tongue1:

You can actually run a straight hose into it but if your really going to take that M170 that deep do a search on JeepTalk for snorkels and see if you can adapt one of the smaller setups inside that housing and just attach the hose to it. :cool1:
Posted Image Posted Image
El Niņo
Experience is defined as something you get, after you need it.
Give the world the best you have. The best will come back to you...

There are no rules for good photographs, there are only good photographs.
"Thou shalt not bear false witness against thy neighbour." 9th Commandment.
"Speak not Evil of the absent for it is unjust." George Washington, Rule 89 of Civility and Decent Behavior.
Wheeling Gallery ----- E-Mail
Life Member: South Florida Jeep Club

#39 User is offline   Rollbar 

  • Commander
  • Group: GlobalMod
  • Posts: 7,058
  • Joined: 16-May 03
  • Gender:Male
  • Location:Palm Harbor, Florida

Posted 11 March 2006 - 07:00 PM

I just read on the "G" that it is a oil filter set up but U can use another paper filter like a Wix filter.

Here is a good write up on oil bath filters.

Oil Bath Air Filters

Some of us grew up thinking that an air filter was a paper thing that allowed air to pass while trapping dirt particles of a certain size. What a surprise to open up your first old tractor's air filter case and find a can that appears to be filled with the scrap metal swept from around a machine shop metal lathe. To top that off, you have a cup with oil in it ("why would you want to lubricate your carburetor?"). On closer examination (and some reading in a AC D-14 service manual), I found out that this is a pretty ingenious method of cleaning the air in the tractor's intake tract.

How it works

When the engine starts, it sucks a certain amount of the oil out of the cup allowing it to coat the packed-in metal "shavings". This packing causes a massive increase in the amount of oil soaked surface area available to stop dirt particles. The cannister is designed to be the correct height to allow the proper weight oil to not be sucked into the engine but only pulled to the top of the can.

Uncleaned air is sucked in by the same vacuum that draws the oil up on the "shavings". The air is drawn downward towards the oil sump at the bottom of the cannister, usually through a center pipe. Any particles that are truly "large" will likely continue down into the oil left at the bottom of the cup and be trapped. The small dirt particles are trapped on the oil soaked "shavings" as the air moves upward through the outer cannister. If the correct weight oil is in the cup, the end result is that the air leaves the top of the cannister clean.

Potential Problems

The first problem comes with using the wrong weight oil. Use of oil that is too light will cause the oil to be drawn beyond the filter and into the engine. Use of oil that is too heavy will not allow the oil to be drawn up far enough and much of the air cleaning surface area ends up being unused. Manufacturer owner manuals always show the oil weight that is designed for the system. Engineering of the system (we hope) will have picked just the right weight for the size of the cannister, cup, and vacuum pressure.

The second problem comes when the cup is not cleaned regularly. Manuals always recommend daily refilling of the cup and suggest even more frequent cleanings under dusty conditions. The oil may look clean in the cup but after a few hours of running but it has trapped a significant quantity of small particles many of which will be drawn back up into the cleaning surfaces. When the particles-to-oil ratio reaches a certain level, the dirt will begin to hang on (or "sludge up") on the cleaning surfaces. Eventually, instead of just clean air being sucked into the intake, you have chunks of dirt and sludge going with it. Obviously this can be quickly damaging to the engine. If your cannister is filled with sludge, clean it out before using it or it could do more harm than good.

The last problem is with radically altered machines. The oil bath is engineered for the stock engine. Radical changes to the engine mandate changes to the air cleaning system. Care should also be exercised if replacing your oil bath filter. The replacement should be similar in size and engineered capacity to the original.
*MY CJ IS YOUR yJ's DADDY*
'48 Willys; '74CJ5; '80CJ7; '84 CJ8; '86 CJ7

*Who Needs A Stinking Manual When You Have A Fat Wallet For Tech Support!*

*What man is a man who does not make the world better*

Support the Central Florida Bible Camp for kids

#40 User is offline   Jim B 

  • Commander
  • Group: GlobalMod
  • Posts: 8,692
  • Joined: 30-April 03
  • Gender:Male
  • Location:Davie, FL

  Posted 12 March 2006 - 07:03 PM

You bring up a good point :scratch: 
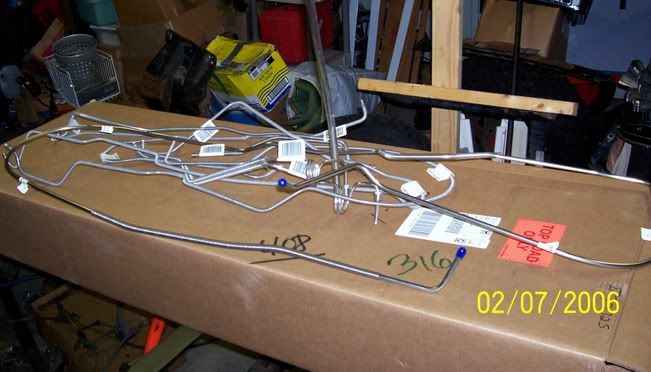
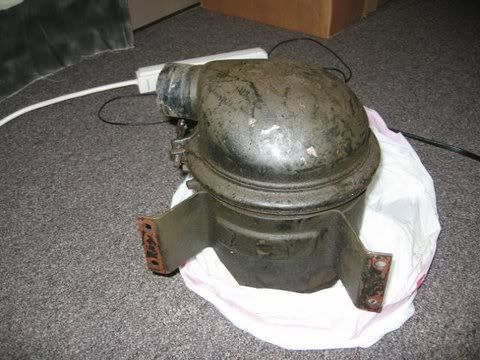
with all this information and I think one of the Moderators of this forum out to split this info it's own subject thread regarding "Oil Bath Air Filters".

Because of this you've made me look back at my manual to see what they recommend for oil weight as I run an original oil bath air cleaner. :cool1:

I have looked into my intake and it does look mighty clean. I've changed engine oil but I never have opened the oil bath unit since the engine only has 1500 miles from when it was all redone.
Posted Image Posted Image
El Niņo
Experience is defined as something you get, after you need it.
Give the world the best you have. The best will come back to you...

There are no rules for good photographs, there are only good photographs.
"Thou shalt not bear false witness against thy neighbour." 9th Commandment.
"Speak not Evil of the absent for it is unjust." George Washington, Rule 89 of Civility and Decent Behavior.
Wheeling Gallery ----- E-Mail
Life Member: South Florida Jeep Club

#41 User is offline   Rollbar 

  • Commander
  • Group: GlobalMod
  • Posts: 7,058
  • Joined: 16-May 03
  • Gender:Male
  • Location:Palm Harbor, Florida

Posted 13 March 2006 - 10:49 PM

Well this past weekend I got my SS brake lines & my SS fuel lines in. I did the SOA to SUA (front only), I left the rear SOA like a P/U truck set up untill I get the load on the rear to see how it sits (we sat on the rear w/the yJ spring set up & I added springs so it should be close to level once I get thing loaded on the frame). If I need to change it, it will only take about a hour.

RollBar

P.S. I just ordered my gas tank filler lines from 4WDH, another 70 bucks but I have to have'em b-4 I mount the tub, I want to get everything done I can b-4 the tub goes on. The PO cut the filler lines & the CJ7's won't fit, to short.

P.S.S. This weekend I hope to finish the steering mount (had to drill & tap some holes last week :flower: ) & mount the tub. We will see. :cool1:
*MY CJ IS YOUR yJ's DADDY*
'48 Willys; '74CJ5; '80CJ7; '84 CJ8; '86 CJ7

*Who Needs A Stinking Manual When You Have A Fat Wallet For Tech Support!*

*What man is a man who does not make the world better*

Support the Central Florida Bible Camp for kids

#42 User is offline   Rollbar 

  • Commander
  • Group: GlobalMod
  • Posts: 7,058
  • Joined: 16-May 03
  • Gender:Male
  • Location:Palm Harbor, Florida

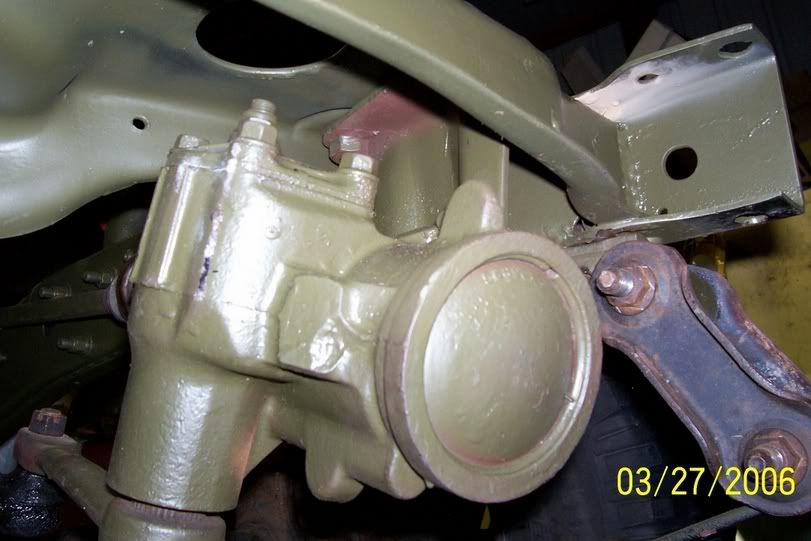
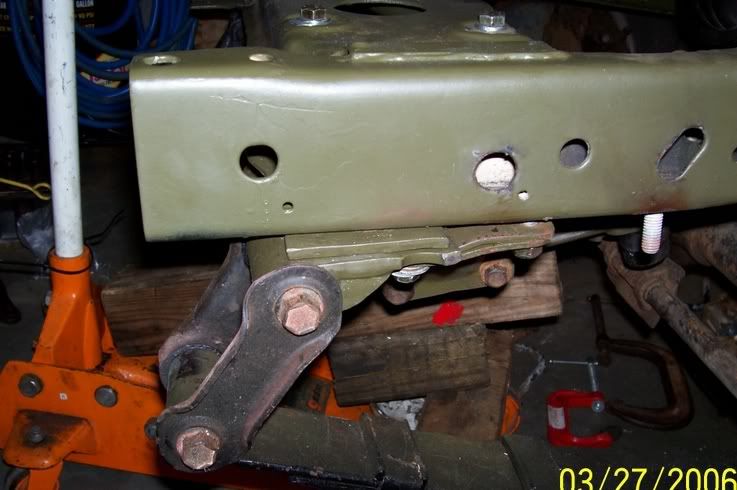
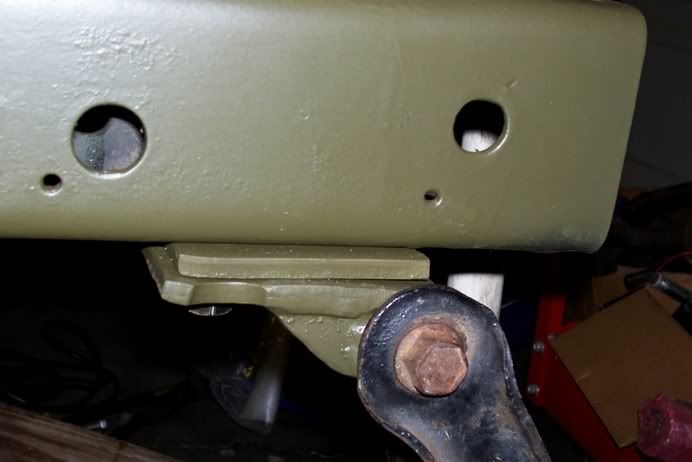
Posted 27 March 2006 - 08:07 PM

O.k. got the filler hoses from *--*- & all the SS lines are installed. Just finished installing the steering box w/the shaft after fighting the front shackle. If U look at the previous post w/the shackles U will notice I used a gusset on each side of the shackle, well it works fine as long as the steering bracket is left off. U can only gusset the outside of the shackle so the bracket will fit. I had to grind one side off but I did weld the bushing housing to the backing to make it stronger.

I used the rear of the stock shackle & I cut the old front CJ ones off to make a spacer so I didn't have to grind off the rivet.

Now I did buy a pair fromJCW for the rear that were gusseted (if that is a word) but they are allot thinner metal & cheap. So use the rear up front & buy or get a set for the rear.

I have pics but I am working on my NEW album from my NEW host so I will have to post them here later.
Hopefully I can get the tub on next weekend (trying to get moved) so I can move my project to my NEW warehouse which will be for my NEW site etc.

RollBar

P.S. It steers, :biggrin1:

O.K. here's some pics, paint still kind of wet & it looks like I missed a couples of spots but that's O.K. I'll catch it later.

Posted Image

Posted Image

Posted Image

Posted Image

Posted Image

Posted Image

Posted Image
*MY CJ IS YOUR yJ's DADDY*
'48 Willys; '74CJ5; '80CJ7; '84 CJ8; '86 CJ7

*Who Needs A Stinking Manual When You Have A Fat Wallet For Tech Support!*

*What man is a man who does not make the world better*

Support the Central Florida Bible Camp for kids

#43 User is offline   Rollbar 

  • Commander
  • Group: GlobalMod
  • Posts: 7,058
  • Joined: 16-May 03
  • Gender:Male
  • Location:Palm Harbor, Florida

Posted 30 December 2006 - 08:22 PM

The panel just arrived, notice how the top edge is not rolled into the door seat but it is stepped into the door seat, (meanning where the door hits & seals). The top right inside door seat of the stamp is correct, just not the bottom of the door seat.

I bought it to cut it up & use for filler pieces on the 8 so I'm not worried about the door seat, I just wanted to point it out to those who might purchase one. I did over lay it on the body & it is very close.

Posted Image

Posted Image

Posted Image

RollBar

P.S. Notice where it was made, :banghead:. At least it wasn't made in China, :boo: :boo:
*MY CJ IS YOUR yJ's DADDY*
'48 Willys; '74CJ5; '80CJ7; '84 CJ8; '86 CJ7

*Who Needs A Stinking Manual When You Have A Fat Wallet For Tech Support!*

*What man is a man who does not make the world better*

Support the Central Florida Bible Camp for kids

#44 User is offline   Rollbar 

  • Commander
  • Group: GlobalMod
  • Posts: 7,058
  • Joined: 16-May 03
  • Gender:Male
  • Location:Palm Harbor, Florida

Posted 01 January 2009 - 06:07 PM

Ok, starting back to work on the conversion. A friend of mine gave me a 6mo old set of Super lift springs (2.5") & so they were installed them on the rear (SOA)(might need a step ladder to work under it :) 
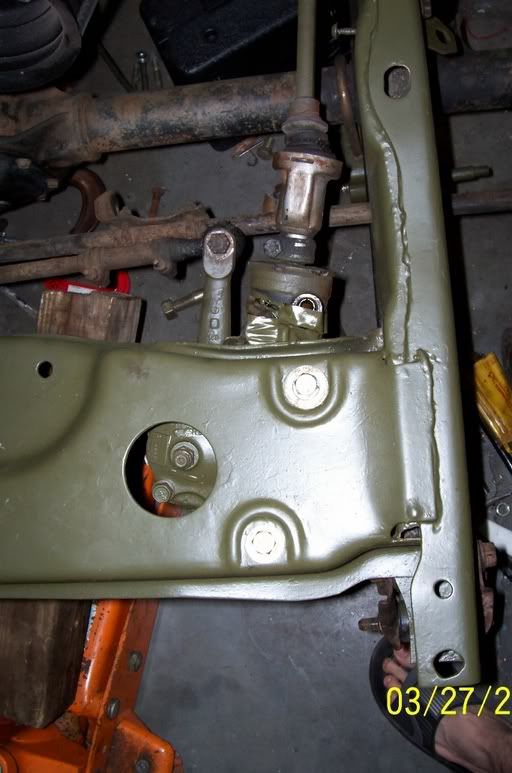
. Here are some pics of the height of the frame ONLY :click: & the finished install of the rear pack/shocks. The frame is sitting on 33's. Tomorrow, the front. I just have to figure out where to put my bump stops :tooth:

Posted Image

Posted Image

Posted Image

:click: look where they R made. Tranny Doc should like that :)
Posted Image

Posted Image

We will be building a set of rock guards later on w/a step. Oh, did I mention, adding the body to this measurement would make the top of the rear of the Jeep 5' off the ground plus a 1"BL. It should setting some, I hope. There is a 12" load spring to help when I tow the camper. I hope it doesn't crack the spring where the load spring ends, still contemplating whether or not to leave it due to that reason.

Oh no, I just realized I didn't prime the shocks & then OD them. Jim is gonna have my tuercas.
*MY CJ IS YOUR yJ's DADDY*
'48 Willys; '74CJ5; '80CJ7; '84 CJ8; '86 CJ7

*Who Needs A Stinking Manual When You Have A Fat Wallet For Tech Support!*

*What man is a man who does not make the world better*

Support the Central Florida Bible Camp for kids

#45 User is offline   Rollbar 

  • Commander
  • Group: GlobalMod
  • Posts: 7,058
  • Joined: 16-May 03
  • Gender:Male
  • Location:Palm Harbor, Florida

Posted 02 January 2009 - 11:11 AM

Ok, I went on Tom Woods site to get some info on the DS angles etc. (as U can see I'm using his business card w/the scale on the back of it :) 
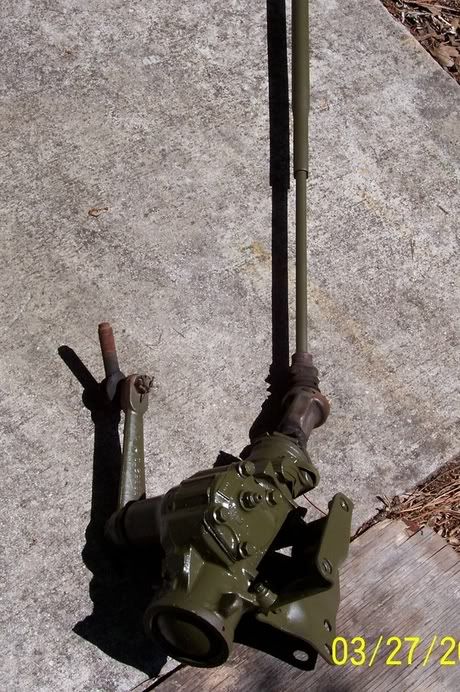
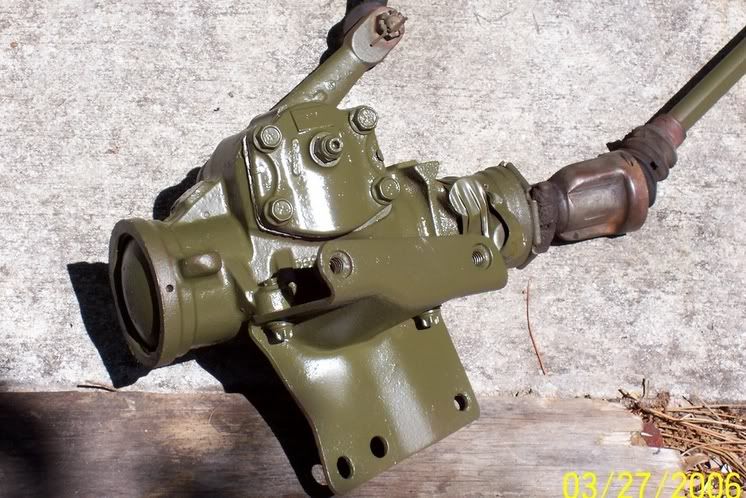
) I have a cardan joint DS out of a J10 (kept in stock) which is to short for the rear so I set the original CJ's rear DS in place w/out the U-J cups just to see where I'm at. T-Woods says, If you do have a substantial lift on the vehicle, you may want to consider a double cardan (CV) drive shaft since with a conventional two joint drive shaft you need to keep the output of the transfer case & the pinion parallel within 1 degree, and in relationship to either the drive shaft should be running at absolutely no greater than 15 degrees (this is a pushed limit). If you cannot fall within this parameter, then you will want to pitch the differential so that the pinion points directly at the output of the transfer case (maintaining 3 degrees, or less, a joint angle at the differential end) & use a double cardan (C.V.) drive shaft.

So here is what I have (w/out the cups but it's very close, I guess I could put them in but this is just preliminary). 14-15* on the stock set up. The pinion is almost parallel to the t-case & the DS is almost fully collapsed. (looking for a flywheel for a 360 so I can mount my T-176 back in, donations excepted :) )

Drive shaft measurments-yoke to yoke-cup to cup are:
Front - 35 1/8"
Rear - 32 3/4" - 32 7/8" trans must be off a hair.

Can't find my dial indicator :(

I do have a 1" T-case drop kit in stock.

I also have some 6* shims.
Posted Image

Posted Image

Posted Image

Posted Image

Posted Image

Posted Image

Posted Image

Posted Image

Maybe I should just go w/the 2.5 SUA & the 1"BL. :(
*MY CJ IS YOUR yJ's DADDY*
'48 Willys; '74CJ5; '80CJ7; '84 CJ8; '86 CJ7

*Who Needs A Stinking Manual When You Have A Fat Wallet For Tech Support!*

*What man is a man who does not make the world better*

Support the Central Florida Bible Camp for kids

#46 User is offline   Jim B 

  • Commander
  • Group: GlobalMod
  • Posts: 8,692
  • Joined: 30-April 03
  • Gender:Male
  • Location:Davie, FL

Posted 03 January 2009 - 11:42 AM

Jim,

I'm glad to see that you picked up and are continuing this project. :2thumup: Get it ready for when you have to leave it at my place. :lol:

With regards to the DS....

First, please do not use the TC drop, it looks like hell and you are defeating the purpose for ground clearance. Take the J10 DS CV that you have which is too short, send it to Tom Wood. :ya: He will lengthen and rebuild whatever is screwed up. It will not cost as much as a new one (only a fraction).

When you get it, set it .5 to 1 degree below the pinion. Under torque she will be at 0 degree.
Posted Image Posted Image
El Niņo
Experience is defined as something you get, after you need it.
Give the world the best you have. The best will come back to you...

There are no rules for good photographs, there are only good photographs.
"Thou shalt not bear false witness against thy neighbour." 9th Commandment.
"Speak not Evil of the absent for it is unjust." George Washington, Rule 89 of Civility and Decent Behavior.
Wheeling Gallery ----- E-Mail
Life Member: South Florida Jeep Club

#47 User is offline   Rollbar 

  • Commander
  • Group: GlobalMod
  • Posts: 7,058
  • Joined: 16-May 03
  • Gender:Male
  • Location:Palm Harbor, Florida

Posted 03 January 2009 - 11:46 PM

View PostJim B, on Jan 3 2009, 11:42 AM, said:

When you get it, set it .5 to 1 degree below the pinion. Under torque she will be at 0 degree.

Explain OB1. Not getting the picture, don't have digital yet, pics & a write up will work. :2thumup:

P.S. My $3.99 angle/degree finder will be here shortly from HF. :lol:

#48 User is offline   Jim B 

  • Commander
  • Group: GlobalMod
  • Posts: 8,692
  • Joined: 30-April 03
  • Gender:Male
  • Location:Davie, FL

Posted 04 January 2009 - 10:45 AM

View PostRollbar, on Jan 3 2009, 11:46 PM, said:

Explain OB1. Not getting the picture, don't have digital yet, pics & a write up will work. :2thumup:

P.S. My $3.99 angle/degree finder will be here shortly from HF. :lol:

That is all I have is the cheaper angle finder which I got at Sears and it will works just as good.

What I meant was the have the rear diff angle .5 to 1 degree below the DS in parallel.
Posted Image Posted Image
El Niņo
Experience is defined as something you get, after you need it.
Give the world the best you have. The best will come back to you...

There are no rules for good photographs, there are only good photographs.
"Thou shalt not bear false witness against thy neighbour." 9th Commandment.
"Speak not Evil of the absent for it is unjust." George Washington, Rule 89 of Civility and Decent Behavior.
Wheeling Gallery ----- E-Mail
Life Member: South Florida Jeep Club

#49 User is offline   Rollbar 

  • Commander
  • Group: GlobalMod
  • Posts: 7,058
  • Joined: 16-May 03
  • Gender:Male
  • Location:Palm Harbor, Florida

Posted 04 January 2009 - 03:04 PM

Ok, soooooooooooo, W/the diff's yoke point level U want it .5 to 1 below the straight line, correct? If the DS is pointing up at the T-case U still want it .5 to 1 below the parallel, correct?

Now, does this apply to SOA since the rear would rotate more?
*MY CJ IS YOUR yJ's DADDY*
'48 Willys; '74CJ5; '80CJ7; '84 CJ8; '86 CJ7

*Who Needs A Stinking Manual When You Have A Fat Wallet For Tech Support!*

*What man is a man who does not make the world better*

Support the Central Florida Bible Camp for kids

#50 User is offline   JeepinIan 

  • Major General
  • View gallery
  • Group: Members
  • Posts: 3,384
  • Joined: 01-May 03
  • Gender:Male
  • Location:Miami, Fl USA

Posted 05 January 2009 - 08:46 AM

Yes, my rear axle is about 1 degree below a striaght line w/ the d-shaft.
Ian Stewart

If you don't fight for the trails, there won't be any trails to fight for.

What you get by achieving your goals is not as important as what you become by achieving your goals.
Zig Ziglar

"War is an ugly thing, but not the ugliest of things. The decayed and degraded state of moral and patriotic feeling that thinks that nothing is worth war is much worse. The person who has nothing for which he is willing to fight, nothing which is more important than his own personal safety, is a miserable creature and has no chance of being free unless made and kept so by the exertions of better men than himself." ....

John Stuart Mill

#51 User is offline   Rollbar 

  • Commander
  • Group: GlobalMod
  • Posts: 7,058
  • Joined: 16-May 03
  • Gender:Male
  • Location:Palm Harbor, Florida

Posted 10 January 2009 - 07:40 PM

Here's my son sanding down the shocks so they can be painted OD green so JimB would not have a cow w/the white ones :2thumup:

Posted Image

Here's the old man tightening down a shock.
Posted Image

More to come.

Just a note: had to re-convert to a the SUA (picks when the camera gets new batteries), the War Dept's troops said it was to tall. Oh well, at least everything will go back easier. When my dial indicator comes in I will check the outers for the degree that they are setting & if need be add shims to obtain 4-6* of castor with 6* being the optimum.

P.S. I have a pretty good color scheme coming up for the axles that might look good. I have to paint them before the tub goes on. What do you think about this.
1. Outers=Black
2. Tubes=OD
3. Pumpkin=Black
4. Steering=OD
5. DS=Black
*MY CJ IS YOUR yJ's DADDY*
'48 Willys; '74CJ5; '80CJ7; '84 CJ8; '86 CJ7

*Who Needs A Stinking Manual When You Have A Fat Wallet For Tech Support!*

*What man is a man who does not make the world better*

Support the Central Florida Bible Camp for kids

#52 User is offline   Jim B 

  • Commander
  • Group: GlobalMod
  • Posts: 8,692
  • Joined: 30-April 03
  • Gender:Male
  • Location:Davie, FL

Posted 11 January 2009 - 08:42 AM

Darn Jimmy the 8 is looking mighty good and she will turn out to a nice M170. I'm glad you took it down in height. :2thumup: Unless you are going off road there is really no point and it will probably look better, plus I need to be on Peache's side. :shock: Shocks look good. :ya:

On your color scheme. Paint everything OD except for the outers drums. When you need to touch up a few things it would be much easier and it would look too bling. Besides there never was any color schemes in the military. They would OD everything including your butt if they needed to.

Take care of the M170 for me and let me know when she is done so I can bring the trailer and pick her up. :)
Posted Image Posted Image
El Niņo
Experience is defined as something you get, after you need it.
Give the world the best you have. The best will come back to you...

There are no rules for good photographs, there are only good photographs.
"Thou shalt not bear false witness against thy neighbour." 9th Commandment.
"Speak not Evil of the absent for it is unjust." George Washington, Rule 89 of Civility and Decent Behavior.
Wheeling Gallery ----- E-Mail
Life Member: South Florida Jeep Club

#53 User is offline   Rollbar 

  • Commander
  • Group: GlobalMod
  • Posts: 7,058
  • Joined: 16-May 03
  • Gender:Male
  • Location:Palm Harbor, Florida

Posted 11 January 2009 - 03:04 PM

View PostJim B, on Jan 11 2009, 08:42 AM, said:

Darn Jimmy the 8 is looking mighty good and she will turn out to a nice M170. I'm glad you took it down in height. :good2: Unless you are going off road there is really no point and it will probably look better, plus I need to be on Peach's side. :2thumup: Shocks look good. :ya:

On your color scheme. Paint everything OD except for the outers drums. When you need to touch up a few things it would be much easier and it would look too bling. Besides there never was any color schemes in the military. They would OD everything including your butt if they needed to.

Take care of the M170 for me and let me know when she is done so I can bring the trailer and pick her up. :2thumup:


Thanks Jim, if I do go to NZ (still in the planning stage for 2010) then I will drop it off completed (probably have to get rid of all my Jeeps/STUFF :( ). I measured the height of the total finish and the top of the 8's rear bed would have been @ 5 feet w/the 2.5" SOA. I'm not getting any younger so the kids twisting my arm said that it would be better off lowered. So the plan still stands w/the 2.5" seen below & the 1" Day-star BL I have in stock. I think it will be plenty high for me & I can go most places in the South East. It did cut down on expense & build time. I just wish I could come up w/a Flywheel for the 360 so I could mount my clutch, then my DS would not have to be shortened on one end & lengthen on the front. If I do do it, I'll do a write up on it. Since I bought the kit a year ago I might as well replace the seals on the D-300 since it started to leak. Easier to do it now.

So, here are some pics of the 2.5" frame only w/yJ shackles & 6* shims under the rear axle (I do have the big long ones but...........).
Next, brake lines paint then the D-300 re-seal, gear swap, DS & get rid of those shinny V-covers & put the stock one on painted black.

Posted Image

Posted Image

Posted Image

Posted Image
*MY CJ IS YOUR yJ's DADDY*
'48 Willys; '74CJ5; '80CJ7; '84 CJ8; '86 CJ7

*Who Needs A Stinking Manual When You Have A Fat Wallet For Tech Support!*

*What man is a man who does not make the world better*

Support the Central Florida Bible Camp for kids

#54 User is offline   Jim B 

  • Commander
  • Group: GlobalMod
  • Posts: 8,692
  • Joined: 30-April 03
  • Gender:Male
  • Location:Davie, FL

Posted 12 January 2009 - 08:14 AM

Jim, nice clean job :).

I say if the axle housing is already painted black along with cover leave it all black and it does look good. I would not mix OD and black though. The 2.5 looks good but if you get a chance on a rainy day turn those white walls to the inside. :lol:
Posted Image Posted Image
El Niņo
Experience is defined as something you get, after you need it.
Give the world the best you have. The best will come back to you...

There are no rules for good photographs, there are only good photographs.
"Thou shalt not bear false witness against thy neighbour." 9th Commandment.
"Speak not Evil of the absent for it is unjust." George Washington, Rule 89 of Civility and Decent Behavior.
Wheeling Gallery ----- E-Mail
Life Member: South Florida Jeep Club

#55 User is offline   Rollbar 

  • Commander
  • Group: GlobalMod
  • Posts: 7,058
  • Joined: 16-May 03
  • Gender:Male
  • Location:Palm Harbor, Florida

Posted 12 January 2009 - 10:03 AM

View PostJim B, on Jan 12 2009, 08:14 AM, said:

Jim, nice clean job :ya:.

I say if the axle housing is already painted black along with cover leave it all black and it does look good. I would not mix OD and black though. The 2.5 looks good but if you get a chance on a rainy day turn those white walls to the inside. :ya:


Thanks, I figure after I do my first gear install ( :) :lol: ) on the rears I will paint them. Nice thought on the tires, I do have someone who mentioned they have free CJ original white spoke rims I could OD :) .

#56 User is offline   Rollbar 

  • Commander
  • Group: GlobalMod
  • Posts: 7,058
  • Joined: 16-May 03
  • Gender:Male
  • Location:Palm Harbor, Florida

Posted 12 January 2009 - 10:26 PM

OK, took the Dana 300 off the T176 today to re-seal it from the PO. Below are some pics.

Remove shifter and shift plate for twin stick
Posted Image

Remove D-300
Posted Image

D-300 on the cooler
Posted Image

Rear of T176-clean
Posted Image

Removing front yoke nut
Posted Image

Removing yoke w/my steering wheel puller-sorry, all I had
Posted Image

See, I told you it would work, slid right off
Posted Image

Front seal leaking
Posted Image

Remove pan to drain it quicker
Posted Image

Funky stuff, looks like it may of had condensation or some H20 in it
Posted Image

Not any more
Posted Image

Shift rail holder & bolt
Posted Image

Removing aluminum housing to replace seals
Posted Image

Blue loc-tight on shift rail bolt
Posted Image

Aluminum housing re-attached & sealed
Posted Image

Super 300 on the housing where the seal is going to prevent leaks
Posted Image

More super 300
Posted Image

Super 300 on the outside edge of the shift rail seal
Posted Image

Tap shift rail seal in w/a piece of conduit (thick wall), make sure U hold it straight, I cocked the seal but drove it home
Posted Image

Super 300 on front yoke seal & aluminum housing
Posted Image

Grease the front yoke seal rubber & the outside with super 300
Posted Image

Remove & clean front yoke rear bearing cover & shims
Posted Image

Put super 300 on the T-case then install one shim & more super 300, then the last shim & super 300 on the cover.
NOTE: Do not use RTV, it might set the tolerance off on the shims.
Posted Image

Clean bolt threads & dab some blue loc-tight & install cover
Posted Image

Install T-case back on T176-put grease on the output seal of the tranny.
Posted Image

RE-install in the reverse order and follow the torque spec & you are good to go. Sorry, didn't have time to document it.
*MY CJ IS YOUR yJ's DADDY*
'48 Willys; '74CJ5; '80CJ7; '84 CJ8; '86 CJ7

*Who Needs A Stinking Manual When You Have A Fat Wallet For Tech Support!*

*What man is a man who does not make the world better*

Support the Central Florida Bible Camp for kids

#57 User is offline   Rollbar 

  • Commander
  • Group: GlobalMod
  • Posts: 7,058
  • Joined: 16-May 03
  • Gender:Male
  • Location:Palm Harbor, Florida

Posted 16 January 2009 - 02:43 PM

Well, I took the portioning valve apart & cleaned it up, have to go to Lowe's to get two bolt so I can tap the frame (trying to make all my bolts/nuts American standard).


Posted Image

Posted Image

Posted Image

Posted Image

The fluid came out a little rusty but clean.
Posted Image

Posted Image


BTW-it cleaned up well, thanks Ian.

I painted the plate w/Galvanized primer then flat black & then OD green.
Posted Image

Posted Image

Posted Image

#58 User is offline   Rollbar 

  • Commander
  • Group: GlobalMod
  • Posts: 7,058
  • Joined: 16-May 03
  • Gender:Male
  • Location:Palm Harbor, Florida

Posted 18 January 2009 - 12:06 AM

I have a question cause I will be getting close to this soon.

With the rear & front lights (stop etc. Won't have a turn signal w/these ???) will I be able to run them on my build since they are not factory or do they need to be a certain lumen/visual size from a distance. I never thought of it when I bought the NOS parts. I just don't want to drill a hole in the bed (Oh, it pains me to even think about it due to the rarity of the CJ8) to install these if I can't use them.

I did remember someone on here using these lights and adding a LED or something to them. I would like to see the write up to convert but I would also like to keep the original bulb set up to 12V but it might not be bright enough.

Now, the rear will be stop, not sure about turn (haven't looked into it), maybe Jim can see if his are turn equipped when he puts his signal on, I just can't remember that far back.

Pics below:
Posted Image

Here is one of the rear lights opened up, nice rubber mounting, eh!
Posted Image

#59 User is offline   Jim B 

  • Commander
  • Group: GlobalMod
  • Posts: 8,692
  • Joined: 30-April 03
  • Gender:Male
  • Location:Davie, FL

Posted 18 January 2009 - 08:38 AM

View PostRollbar, on Jan 18 2009, 12:06 AM, said:

I have a question cause I will be getting close to this soon.

Now, the rear will be stop, not sure about turn (haven't looked into it), maybe Jim can see if his are turn equipped when he puts his signal on, I just can't remember that far back.

Jim,

I can only tell you how mine work which is only ON (driving lights) & Stop. Mine is a housing and the bulb is actually a whole assembly that plugs in. By the picture you posted your housing looks the same on the outside but different on the inside. Not sure if I can confirm on yours if you will have a turn signal. I use hand signals when I'm driving. :2thumup: :lol:

Before you cut, can you just hook them up to the wiring to see how they work :2thumup: Call up the outfit you bought them from and see what they say. They might have improved over the years to the M170 and put the turn in. Let us know.
Posted Image Posted Image
El Niņo
Experience is defined as something you get, after you need it.
Give the world the best you have. The best will come back to you...

There are no rules for good photographs, there are only good photographs.
"Thou shalt not bear false witness against thy neighbour." 9th Commandment.
"Speak not Evil of the absent for it is unjust." George Washington, Rule 89 of Civility and Decent Behavior.
Wheeling Gallery ----- E-Mail
Life Member: South Florida Jeep Club

#60 User is offline   Rollbar 

  • Commander
  • Group: GlobalMod
  • Posts: 7,058
  • Joined: 16-May 03
  • Gender:Male
  • Location:Palm Harbor, Florida

Posted 18 January 2009 - 02:17 PM

Yes, B-4 I cut I will check it out, maybe a 12V bulb (instead of the 24V in it) w/the dual element will work.

Jim, someone posted & used these lights but installed the LED's, I can't find the post but it was on a red Jeep I think & not yours.

Share this topic:


  • 7 Pages +
  • 1
  • 2
  • 3
  • 4
  • Last »
  • You cannot start a new topic
  • You cannot reply to this topic