
 Help
Help


If you haven't heard yet I am now the proud owner of a mall crawler, I mean a 2011 4 door Rubi unlimited. Not long ago Bill was saying that he wanted to do a write up on a jeep build that will show people that it wasn't that hard to do.It will be nothing fancy, just a 4'' lift, bumpers, sliders, skids, & tires w/spacers
Will that's about it . I need to get going, I have alot to do today.There's a sale today at the Pembroke Pines mall today that I don't want to miss & then I need to go grocery shoping, and then take Tommy & his friend to the movies.
The JK build
#1

- Major
-

- Group: Members
- Posts: 830
- Joined: 15-January 07
- Gender:Male
- Location:Pembroke Pines, Florida
Posted 24 July 2011 - 09:53 AM
#2

- Lieutenant Colonel
-

- Group: Members
- Posts: 1,137
- Joined: 22-July 07
- Gender:Male
- Location:Miramar, FL
Posted 24 July 2011 - 01:38 PM
That's a whole-lot-a new stuff.
Sign me up for build duty!
Sign me up for build duty!
SFJC President
99 TJ - Wrangler Sport
35" Procomp MT, 4.56 RP, 4" Susp, 1" Body, 1" Motor Mount Lift
F: Detroit TrueTrac LS, Chromoly Shafts, Slotted & Drilled Rotors
R: Detroit Soft-Locker & 30 Spline D35c, SYE
Smitty XRC8000 Winch on A-Z Plate & Hella Lights
99 TJ - Wrangler Sport
35" Procomp MT, 4.56 RP, 4" Susp, 1" Body, 1" Motor Mount Lift
F: Detroit TrueTrac LS, Chromoly Shafts, Slotted & Drilled Rotors
R: Detroit Soft-Locker & 30 Spline D35c, SYE
Smitty XRC8000 Winch on A-Z Plate & Hella Lights
#3
- Major
-
- Group: Members
- Posts: 830
- Joined: 15-January 07
- Gender:Male
- Location:Pembroke Pines, Florida
Posted 24 July 2011 - 01:57 PM
The build will start Aug.13, Sat.afternoon around 12:00. and every Sat. after that.The order will be front bumper, rear bumper, sliders, evap skid, then lift.
I talked with Mike at 4 Wheel parts and he is more them willing for us to do the lift there.You are all welcome to come by and lend a hand.Before the time of each install, I'll post up if for some reason I can't do it that day.
The lift date has not been set yet.When the time comes I'll get with Mike and let everyone know.
#4

- Master Sergeant
-

- Group: Members
- Posts: 53
- Joined: 08-September 08
- Gender:Male
- Location:Miami, Florida
Posted 24 July 2011 - 03:05 PM
Awesome  I would love to watch and learn and help out wherever I can
I would love to watch and learn and help out wherever I can
#5

- Brigadier General
-

- Group: Members
- Posts: 3,188
- Joined: 18-May 04
- Gender:Male
- Location:GUAPERIA OFF-ROAD READY PA TU MUNDO
Posted 24 July 2011 - 03:59 PM
ok, ill try to help too for sure!

#6

- Second Lieutenant
-

- Group: Members
- Posts: 204
- Joined: 14-November 09
- Gender:Male
- Location:Pembroke Pines, FL
Posted 24 July 2011 - 04:58 PM
Count me in!
1992 YJ, 4.0, auto, HP D30 w/TJ chromoly shafts, Ford 8.8 LSD, 4.10 gears, NP231J w/AA SYE, Tom Woods Drive Shaft, 4" Pro Comp lift, 1.25" shackle lift, 35" MTZ's, 10,000lb winch, Mark VIII fan, 136 amp alternator, TJ flares, homemade snorkel and rock rails, no track bars or sway bar
Square Headlight Intense Team []lllllll[]
Square Headlight Intense Team []lllllll[]
#7

- Lieutenant Colonel
-
- Group: Members
- Posts: 1,134
- Joined: 23-September 09
- Gender:Male
- Location:Miami, Fl
Posted 24 July 2011 - 05:39 PM
I don't usually work on dem der mall-crawler mobiles, but for you Tommy, I'll be there. 
1991 YJ 3" SOA, 3" BL, 38.5 boggers, SYE, EB D44/8.8, 4.10s, 1999 4.0 High Output motor, BIG rear bumper, 10K vortex winch w/ wireless remote, Square Headlights plus a few extra
1989 YJ. 2"BL, semi-functional snorkel, little "girlie" tires
2001 F350 7.3L turbo diesel, Square Headlights
2007 Honda Rancher 4x4 27" Vampire tires, Square Headlights
Member: South Florida Jeep Club
FOUNDER: Square Headlight Intense Team
"Right is Right even if no one does it & Wrong is Wrong even if everyone does it."
"NEVER look down on someone unless you are helping them up"
"I'm not smart but I can lift heavy things"
#8

- Commander
-

- Group: GlobalMod
- Posts: 8,692
- Joined: 30-April 03
- Gender:Male
- Location:Davie, FL
Posted 26 July 2011 - 10:58 AM
Tommy, keep us posted. Since your are close you are welcome to any of my tools in the event you need something.

El Niño
Experience is defined as something you get, after you need it.
Give the world the best you have. The best will come back to you...
There are no rules for good photographs, there are only good photographs.
"Thou shalt not bear false witness against thy neighbour." 9th Commandment.
"Speak not Evil of the absent for it is unjust." George Washington, Rule 89 of Civility and Decent Behavior.
Wheeling Gallery ----- E-Mail
Life Member: South Florida Jeep Club
#9
- Major
-
- Group: Members
- Posts: 830
- Joined: 15-January 07
- Gender:Male
- Location:Pembroke Pines, Florida
Posted 26 July 2011 - 06:11 PM
Thanks Jim.
#10
- Major
-
- Group: Members
- Posts: 830
- Joined: 15-January 07
- Gender:Male
- Location:Pembroke Pines, Florida
Posted 28 July 2011 - 08:00 PM
Remember when I said I'll let everyone know if I can't do the build on the weekend. As it turns out work called me and said ,every weekend from Aug. 13 we need to do a chiller change out, and it can only be done on the weekends. 
SOOOO,I'm starting Aug,8th, Mon. around 12:30 or so.everyday until every thing but the lift is done. If you can make it,cool, if not I understand.I'll do what I can as far as takeing pics.
If you still would like to help with the lift (at 4 wheel parts), when the time comes I'll post up when the date is set.
#11
- Staff Sergeant
-


- Group: Members
- Posts: 35
- Joined: 10-June 11
- Gender:Male
- Location:Miami Lakes, FL
Posted 29 July 2011 - 11:01 AM
I'm here for help bud just let me know.
rickjcast901
#12
- Major
-
- Group: Members
- Posts: 830
- Joined: 15-January 07
- Gender:Male
- Location:Pembroke Pines, Florida
Posted 08 August 2011 - 06:24 PM
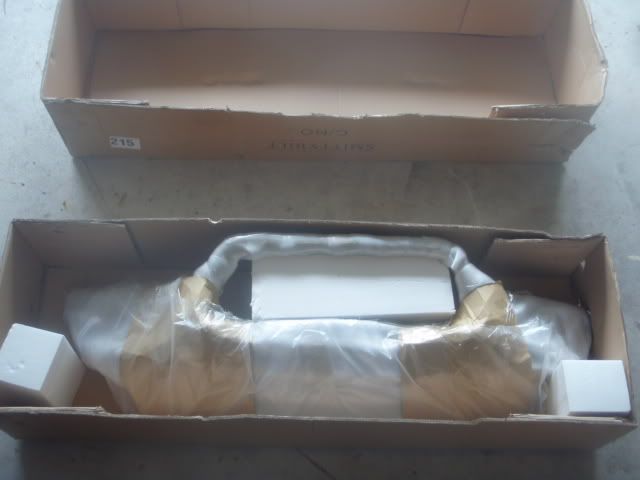
Well today I started on the front bumper.Altogether it took me about 1 1/2 hr. by myself. It went like this.
This is how it came boxed up
1, unplug the lights
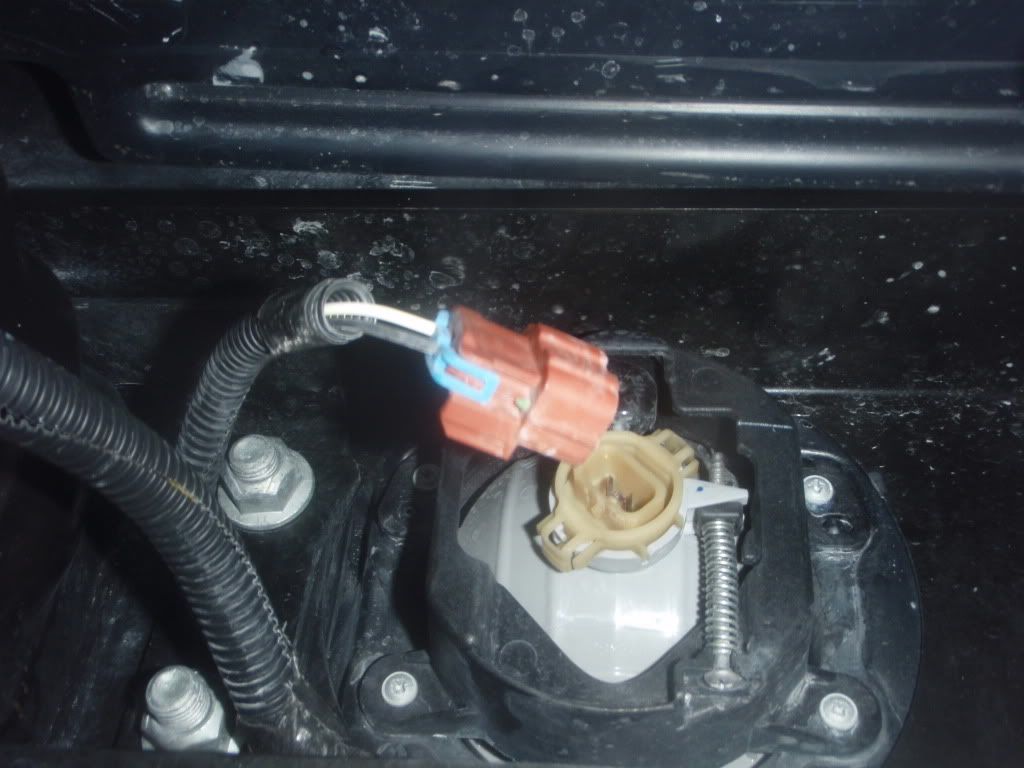
2, unbolt the bumper
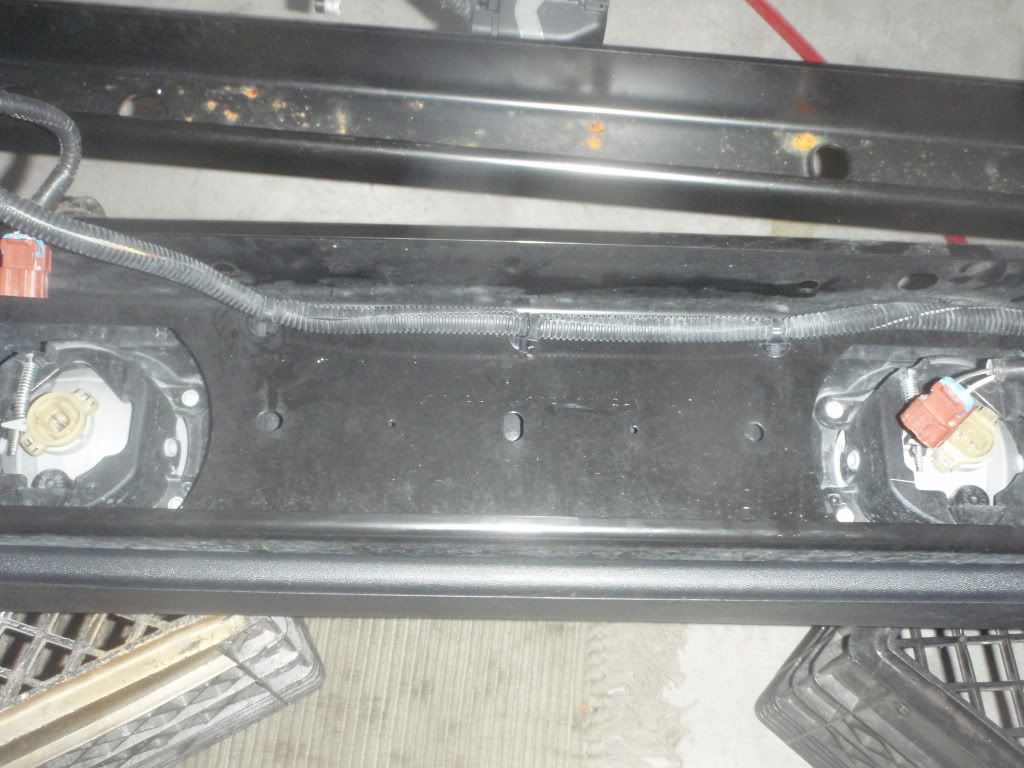
3,lower the bumper down and remove the clips that hold the wire loop for the lights
4, slide the bumper in place.I had a little trouble, the bumper was rubbing
A little BFH and the bumper went on
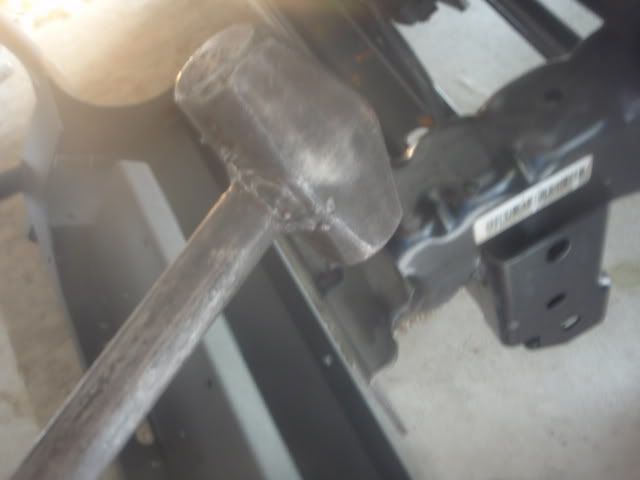
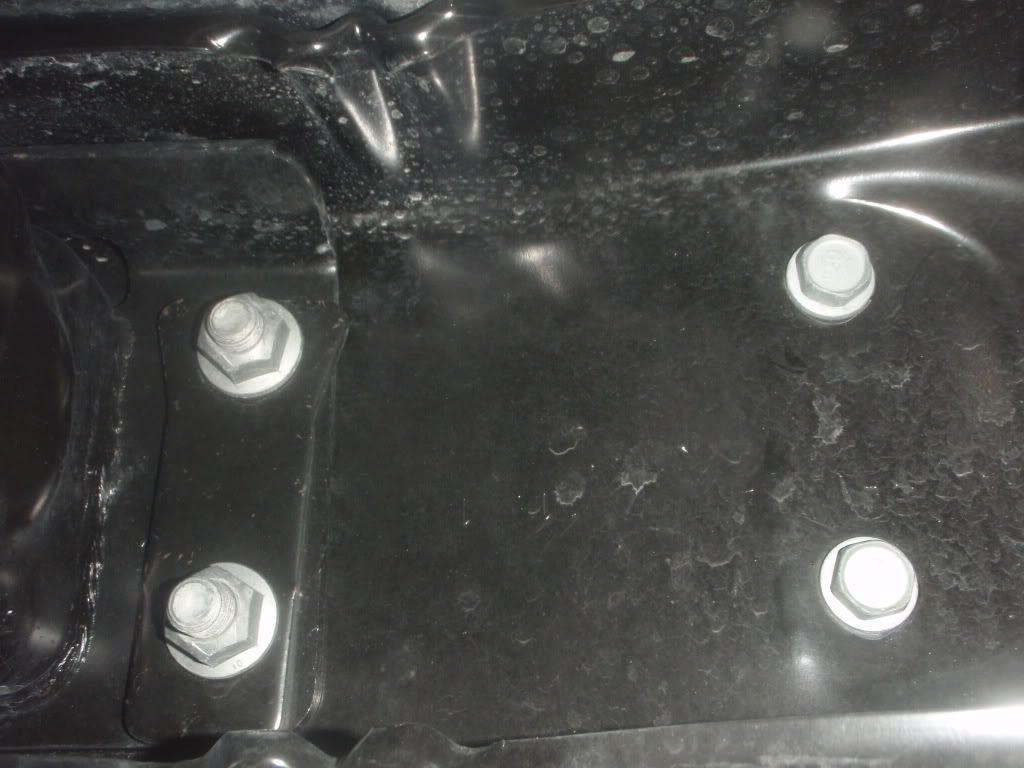
5, Install the 2 bolts & the 8 nuts & washer, tighten everything down

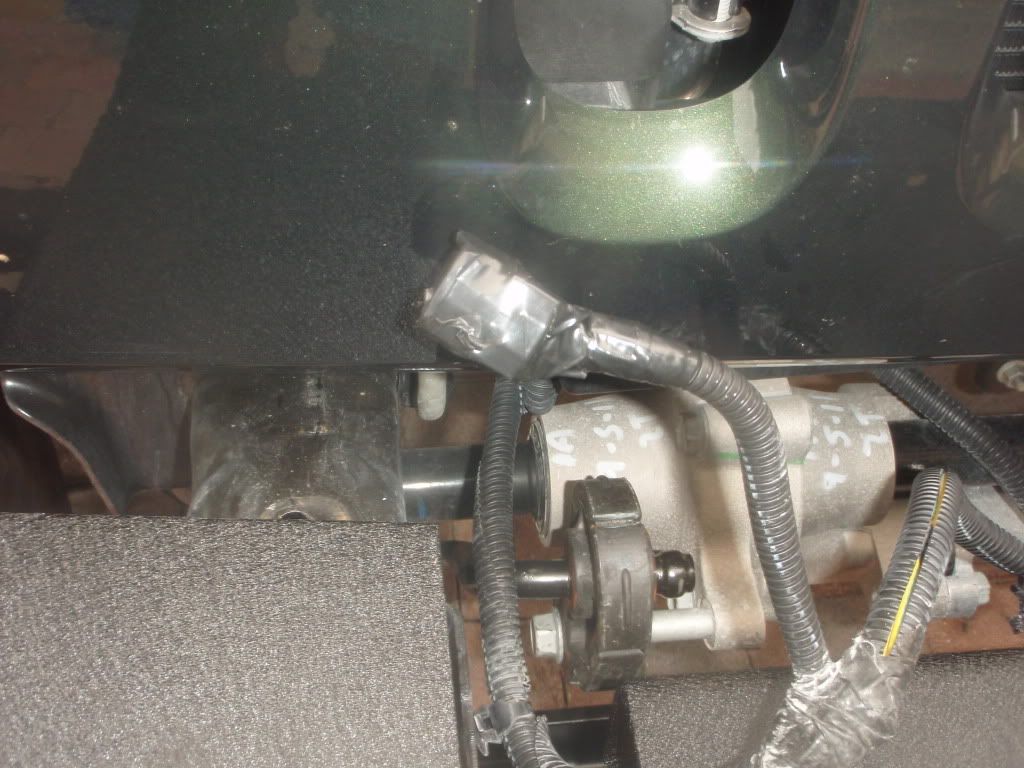
The one one other thing I did was use elect. tap to cover the plug for the lights for now
I think I'll do the sliders tomorrow. So if your free during the day and want to come by just let me know.
This is how it came boxed up
1, unplug the lights
2, unbolt the bumper
3,lower the bumper down and remove the clips that hold the wire loop for the lights
4, slide the bumper in place.I had a little trouble, the bumper was rubbing
A little BFH and the bumper went on
5, Install the 2 bolts & the 8 nuts & washer, tighten everything down
The one one other thing I did was use elect. tap to cover the plug for the lights for now
I think I'll do the sliders tomorrow. So if your free during the day and want to come by just let me know.
#13
- Commander
-
- Group: GlobalMod
- Posts: 8,692
- Joined: 30-April 03
- Gender:Male
- Location:Davie, FL
Posted 10 August 2011 - 09:43 AM
Looking good Tom.  I noticed the pictures on the first post have been removed by photobucket. If you send me the new url location I will edit and fix your first post.
Btw, how heavy is that bumper
I noticed the pictures on the first post have been removed by photobucket. If you send me the new url location I will edit and fix your first post. Btw, how heavy is that bumper
El Niño
Experience is defined as something you get, after you need it.
Give the world the best you have. The best will come back to you...
There are no rules for good photographs, there are only good photographs.
"Thou shalt not bear false witness against thy neighbour." 9th Commandment.
"Speak not Evil of the absent for it is unjust." George Washington, Rule 89 of Civility and Decent Behavior.
Wheeling Gallery ----- E-Mail
Life Member: South Florida Jeep Club
#14
- Major
-
- Group: Members
- Posts: 830
- Joined: 15-January 07
- Gender:Male
- Location:Pembroke Pines, Florida
Posted 10 August 2011 - 10:49 AM
Thanks Jim. I'm not sure on the weight of the bumper, but I would say around 60- 70 lb.?
#15
- Major
-
- Group: Members
- Posts: 830
- Joined: 15-January 07
- Gender:Male
- Location:Pembroke Pines, Florida
Posted 10 August 2011 - 11:18 AM
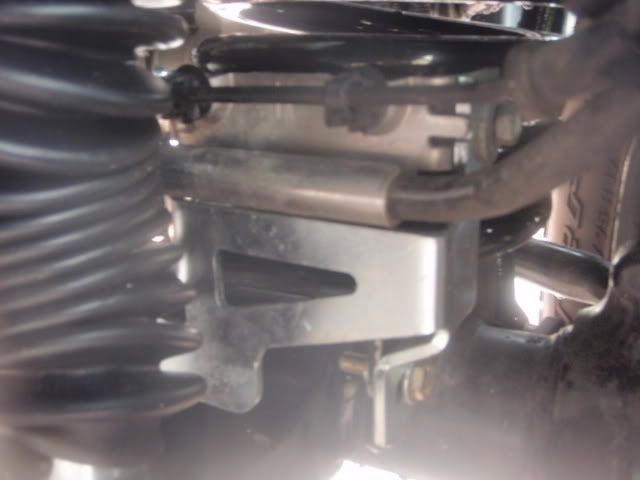
Now is time for the Sliders
As always you need to remove the stock ones.I forgot to take a pic of how it looks but you'll see how to do it
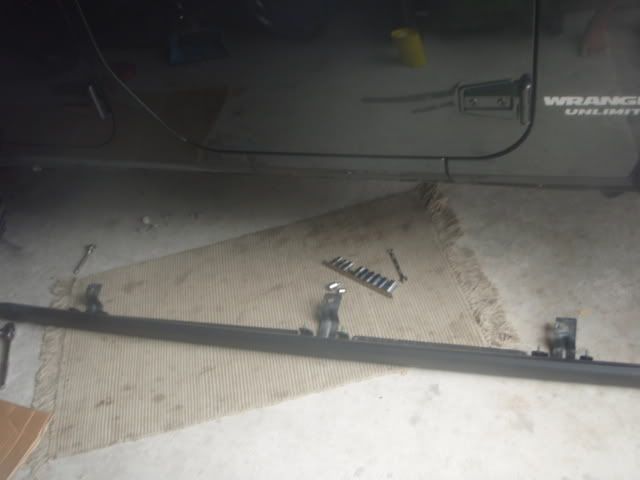
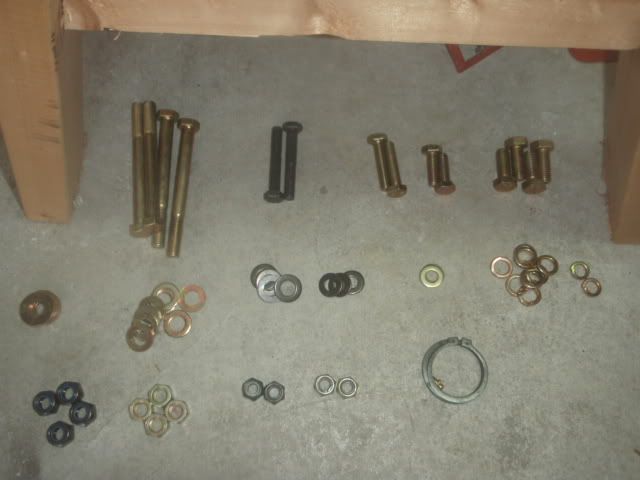
1, lay out all your nuts, bolts, and washers.
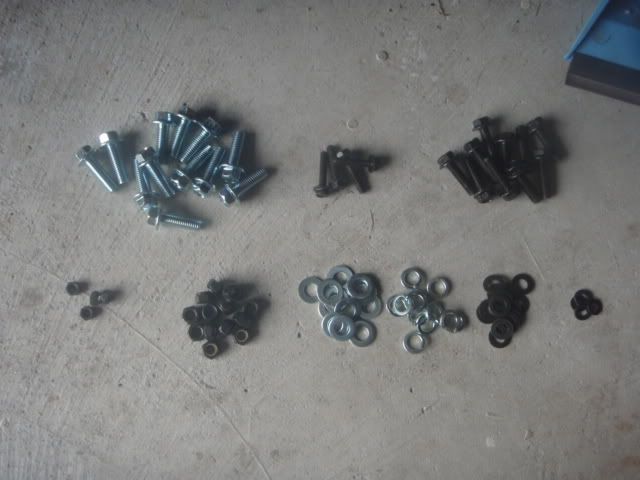
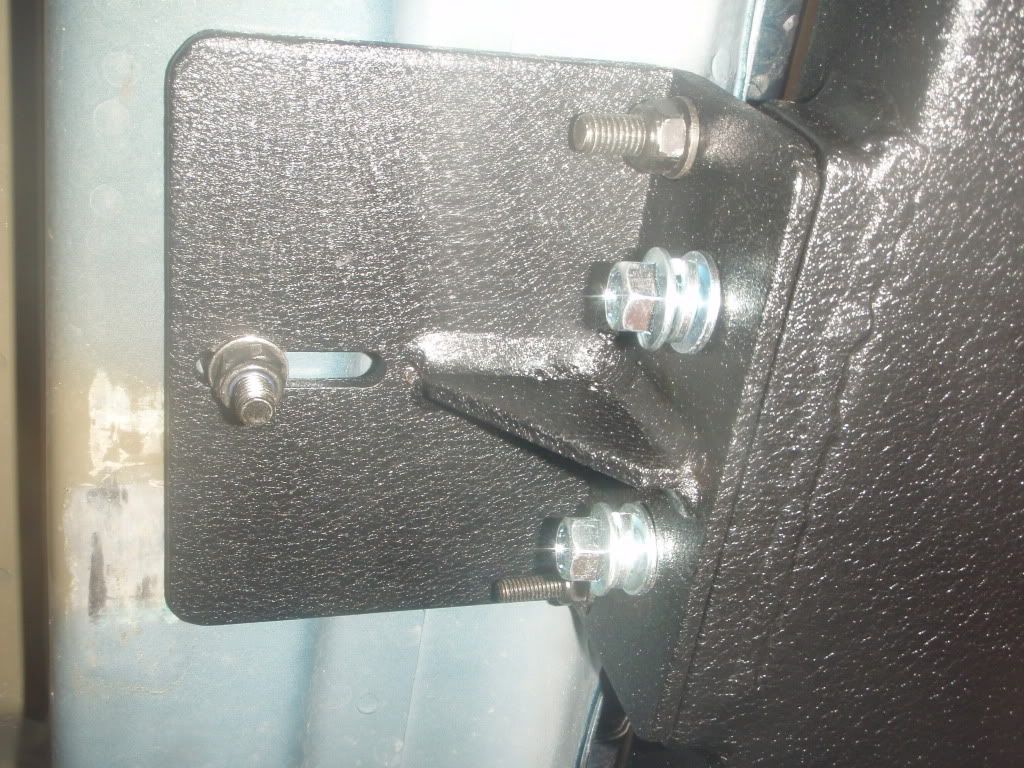
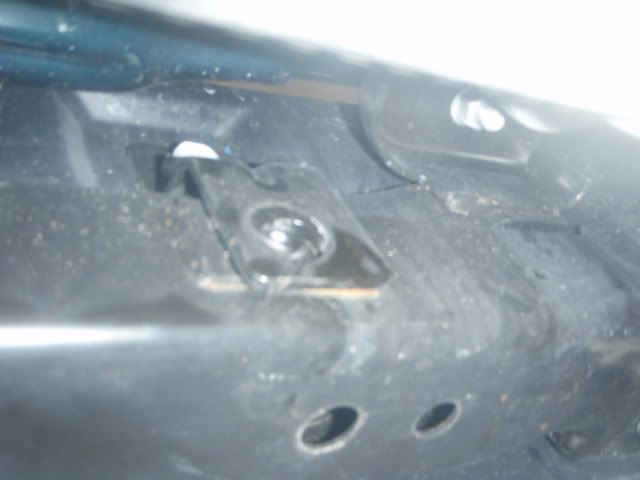
2, there are 3 different brackets. The 2 that are square are for the front & middle. The other is for the rear.
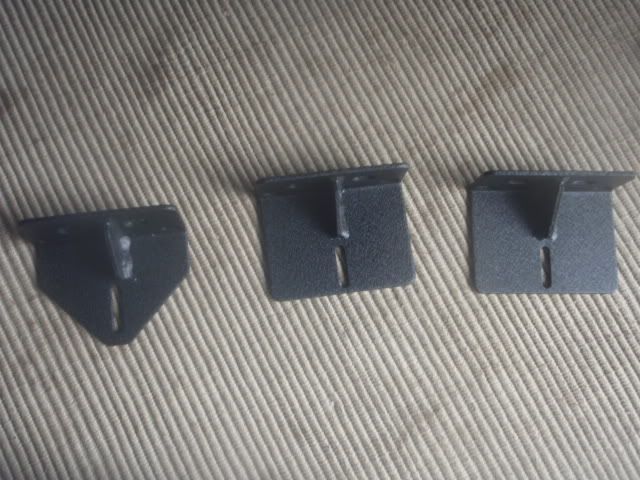
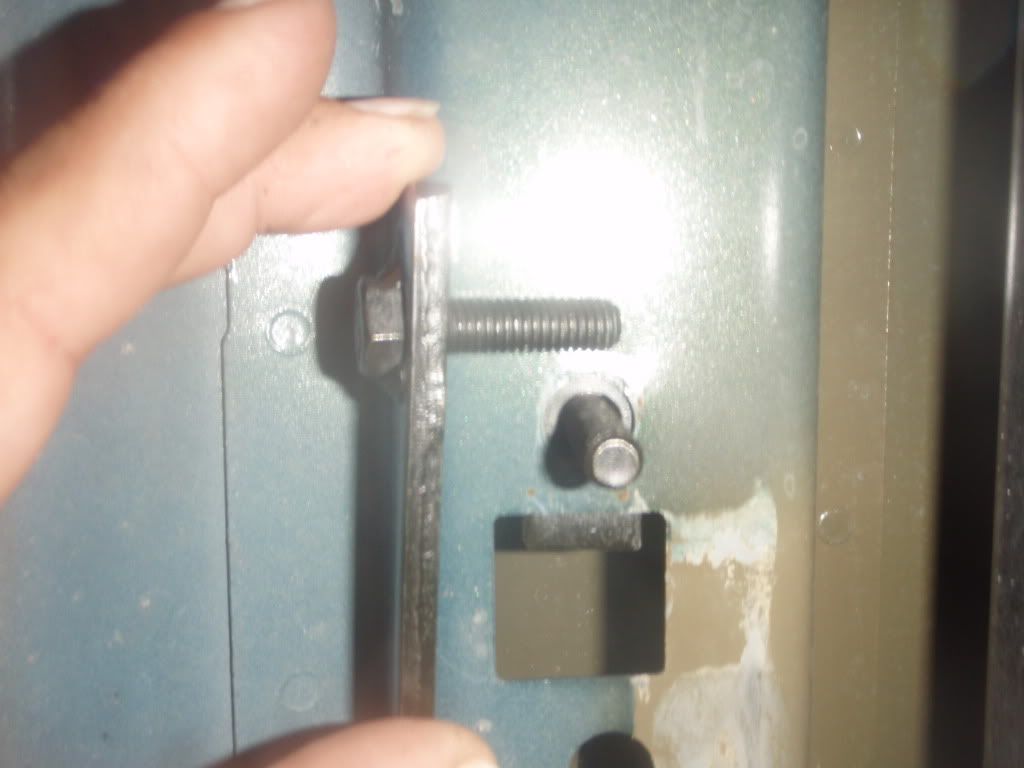
3,On the front & middle you need to remove the u- nut and install the T- bolt. Just slide it in the hole.
4,The rear just bolts on.
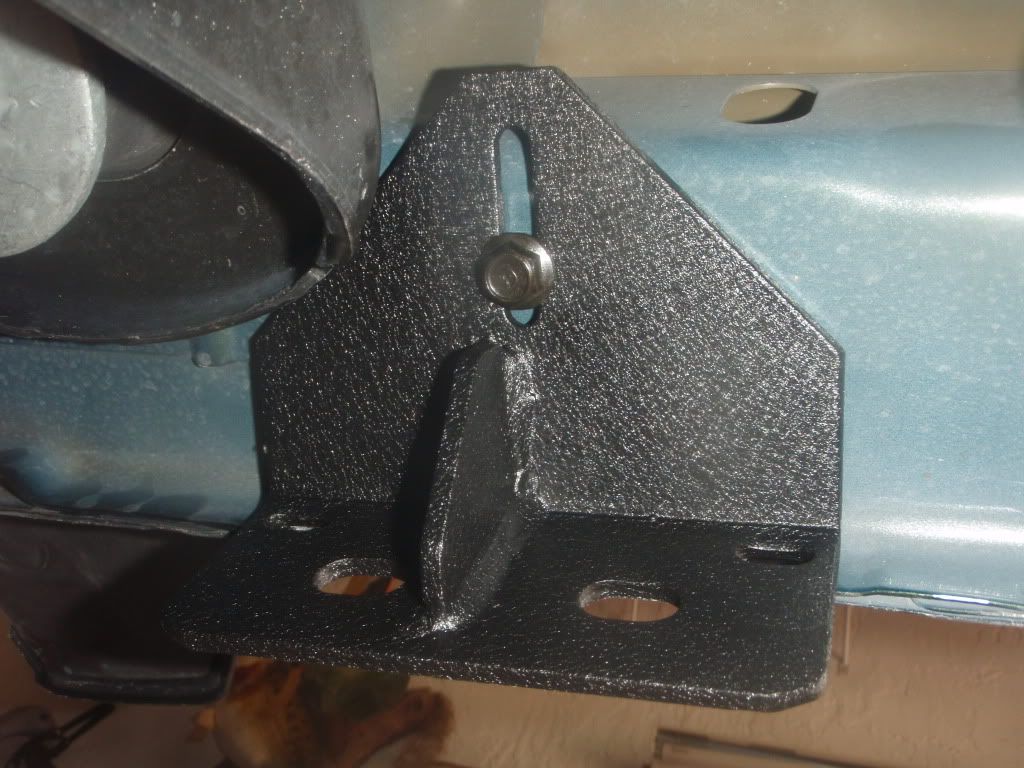
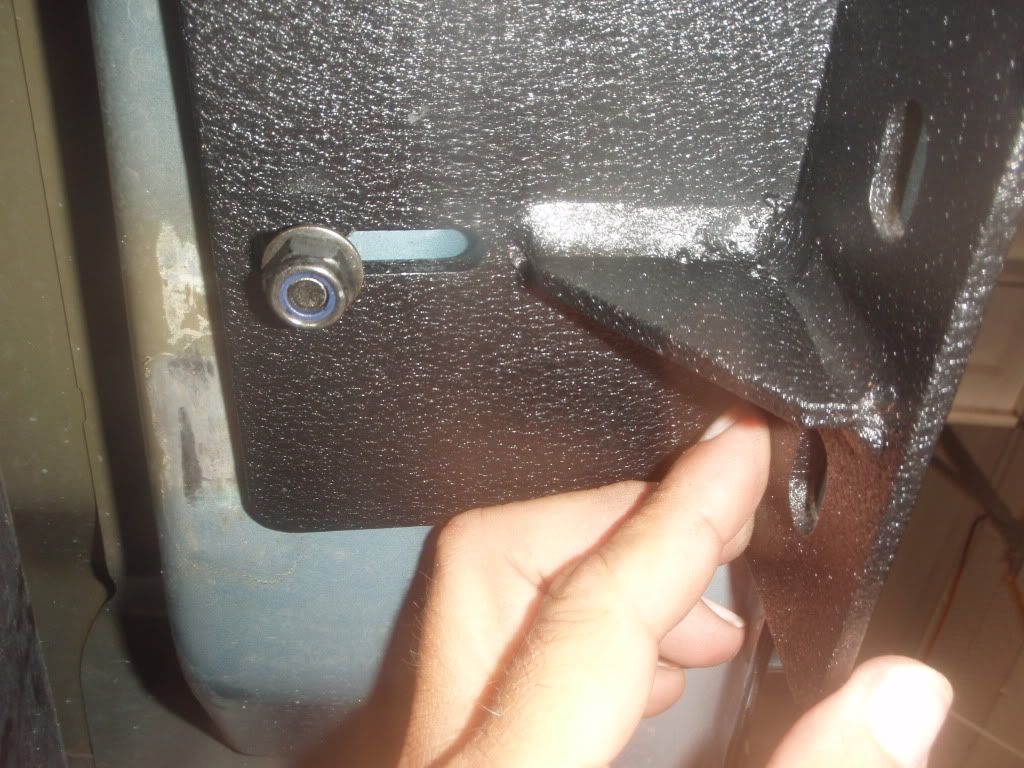
The front & middle bracket.
5, Here you can see the 2 different size bolt holes on the weld seam.
6,Tighten everything down.
7, Hold up one end and install one of the bolts for the slider.
8, Do the same for the other 2 location.
9,Install the rest of the bolts and tighten each one to draw the slider in evenly.
10, Tighten everything up ( tight is tight enough )Go back later in a few days and re tighten everything.
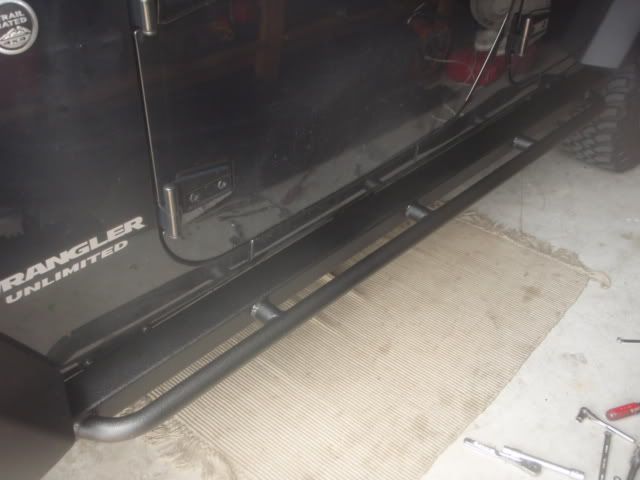
Front
Rear
As always you need to remove the stock ones.I forgot to take a pic of how it looks but you'll see how to do it
1, lay out all your nuts, bolts, and washers.
2, there are 3 different brackets. The 2 that are square are for the front & middle. The other is for the rear.
3,On the front & middle you need to remove the u- nut and install the T- bolt. Just slide it in the hole.
4,The rear just bolts on.
The front & middle bracket.
5, Here you can see the 2 different size bolt holes on the weld seam.
6,Tighten everything down.
7, Hold up one end and install one of the bolts for the slider.
8, Do the same for the other 2 location.
9,Install the rest of the bolts and tighten each one to draw the slider in evenly.
10, Tighten everything up ( tight is tight enough )Go back later in a few days and re tighten everything.
Front
Rear
#16
- Major
-
- Group: Members
- Posts: 830
- Joined: 15-January 07
- Gender:Male
- Location:Pembroke Pines, Florida
Posted 10 August 2011 - 06:22 PM
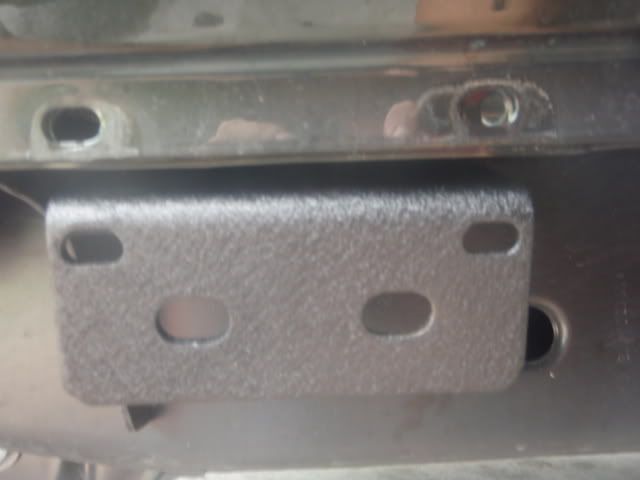
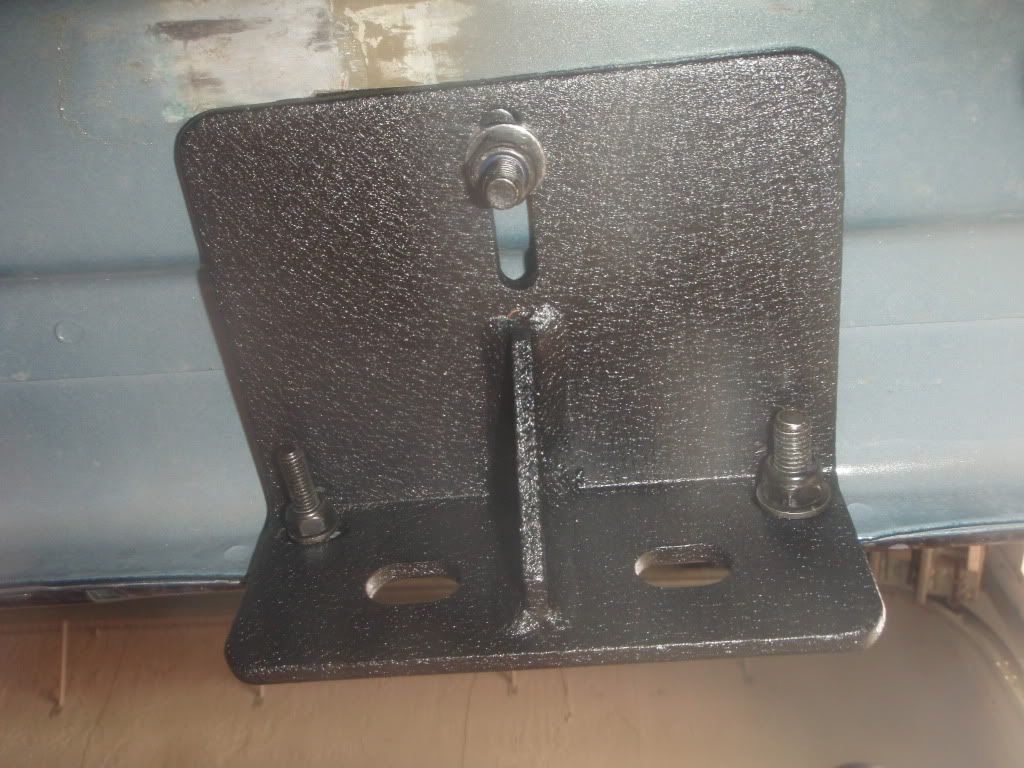
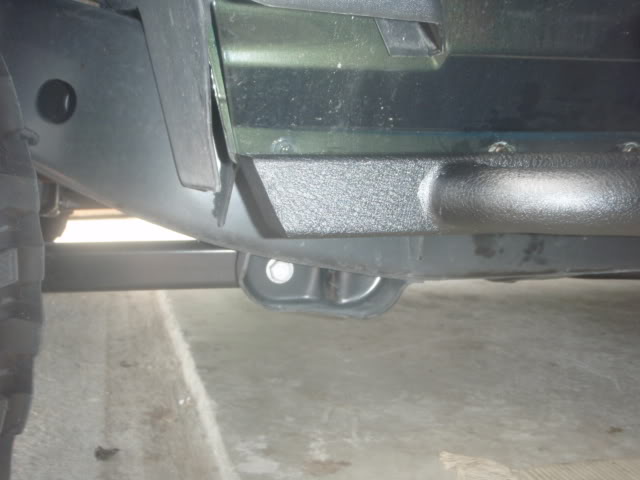
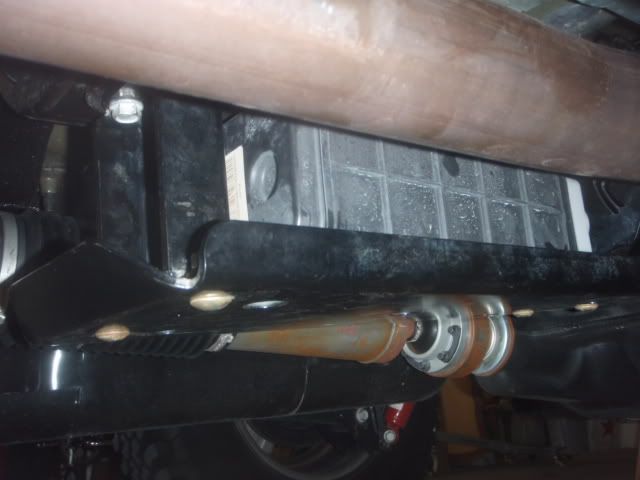
Evap skid time. I got this one from a member,. Thank you Goblin.
This is the skid, and the Evap.
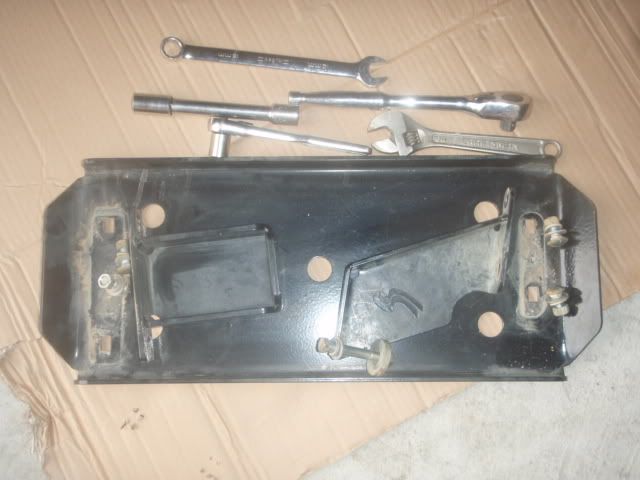
There are 3 bolts and one you need to add
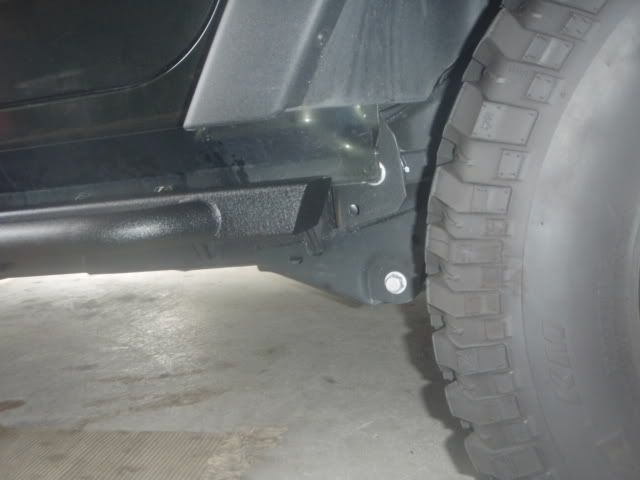
Remove the rear bolt, install the bracket, use the washer as a spacer for the other side.leave every thing loose for now
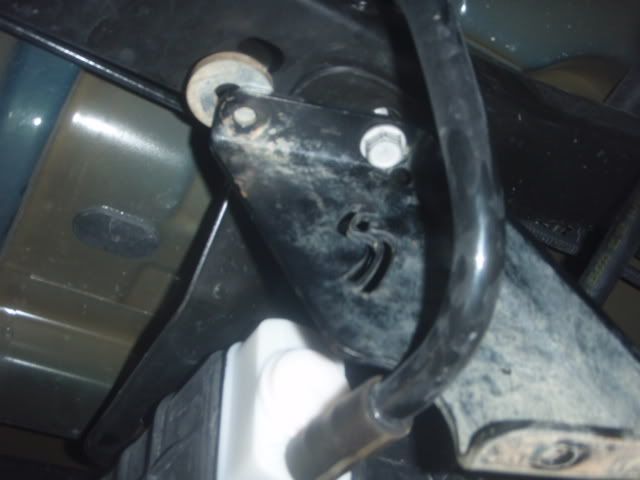
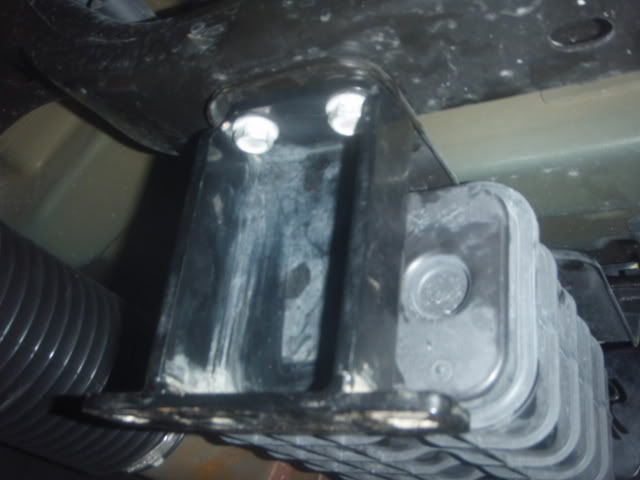
Remove the 2 bolts in the front and install the bracket. Again leave every thing loose.
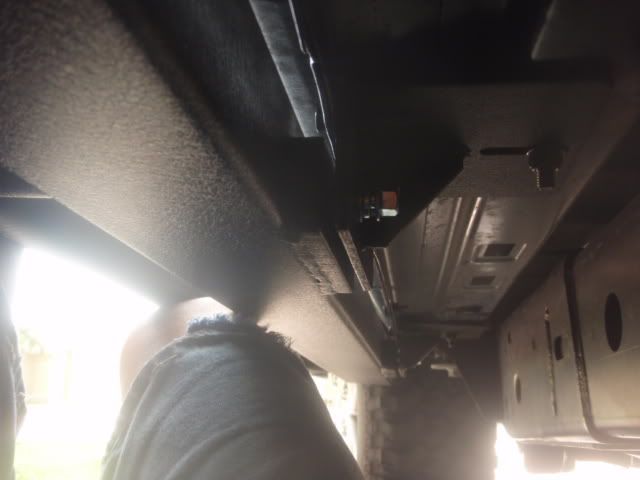
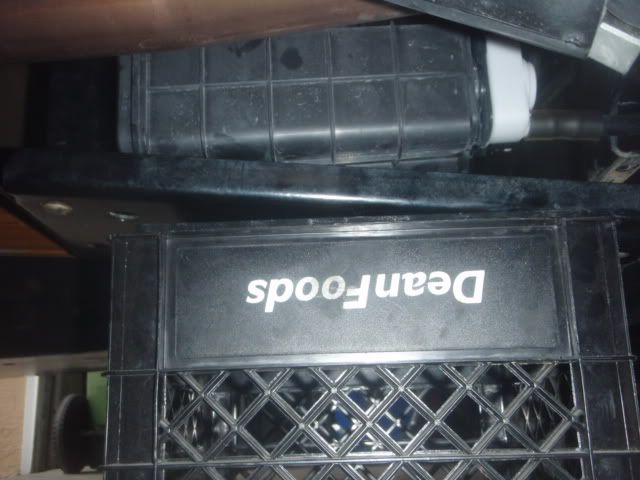
Get your milk crate to hold up the skid to get some bolts started.
Go around and tighten every thing.
This is the skid, and the Evap.
There are 3 bolts and one you need to add
Remove the rear bolt, install the bracket, use the washer as a spacer for the other side.leave every thing loose for now
Remove the 2 bolts in the front and install the bracket. Again leave every thing loose.
Get your milk crate to hold up the skid to get some bolts started.
Go around and tighten every thing.
#17
- Master Sergeant
-
- Group: Members
- Posts: 57
- Joined: 31-July 09
- Gender:Male
- Location:Broward (west of 75 pembroke pines)
Posted 11 August 2011 - 11:35 PM
Hey. that looks good man. Send me a message if you need a hand, I did move and my brother lives in that house down the street from you but now I live in Towngate so I'm still close.
I think since the last time I saw you I've spent more time under Jeeps than over them lol. Been helping everyone I can just to try and learn.
I think since the last time I saw you I've spent more time under Jeeps than over them lol. Been helping everyone I can just to try and learn.
'06 TJ fixed.
2.5" OME Lift
Rubicon Express (pre 4wp) Track Bar in the front
OME Track Bar bracket in the rear
JKs Quick Disconnects
3"BL waiting to come off for my 1.25"BL
33x12.50R15 Mickey Thompson Baja Radial ATZ's
15x8 Cragar Soft 8's
Trail Gear front and rear bumpers.
Red LED interior lights.
2.5" OME Lift
Rubicon Express (pre 4wp) Track Bar in the front
OME Track Bar bracket in the rear
JKs Quick Disconnects
3"BL waiting to come off for my 1.25"BL
33x12.50R15 Mickey Thompson Baja Radial ATZ's
15x8 Cragar Soft 8's
Trail Gear front and rear bumpers.
Red LED interior lights.
#18
- Major
-
- Group: Members
- Posts: 830
- Joined: 15-January 07
- Gender:Male
- Location:Pembroke Pines, Florida
Posted 17 August 2011 - 07:41 PM
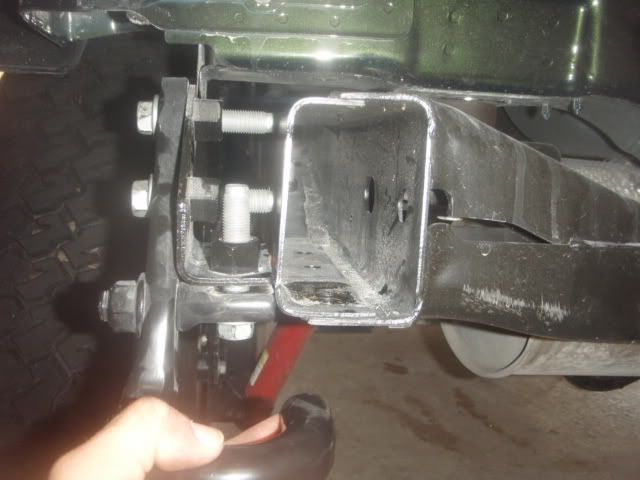
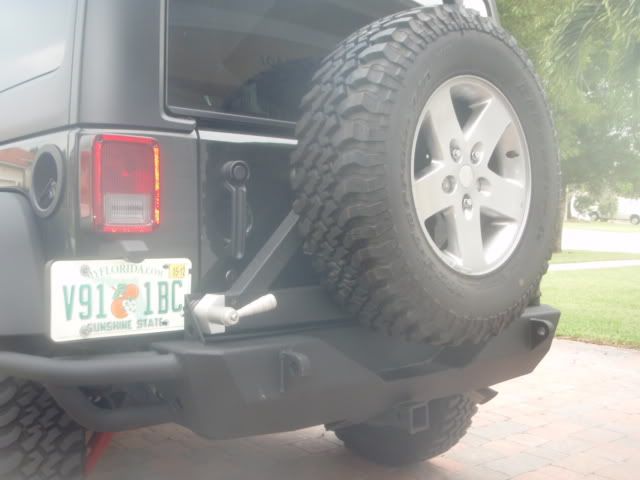
The rear bumper.
Some of the pics did not load up, but I'll try to explain at that point.
1, Remove stock tire carrier and bumper, There are two bolts on each side of the frame rail and two behind the cross rail.
2, Lay out your bolts & washers
3, Remove the stock tow hook and install the backing plate in the left & right frame rails
4, Have your helper ( thanks guys ) hold up the bumper and install the 4 bolts through the bottom on the bumper, do not tighten yet
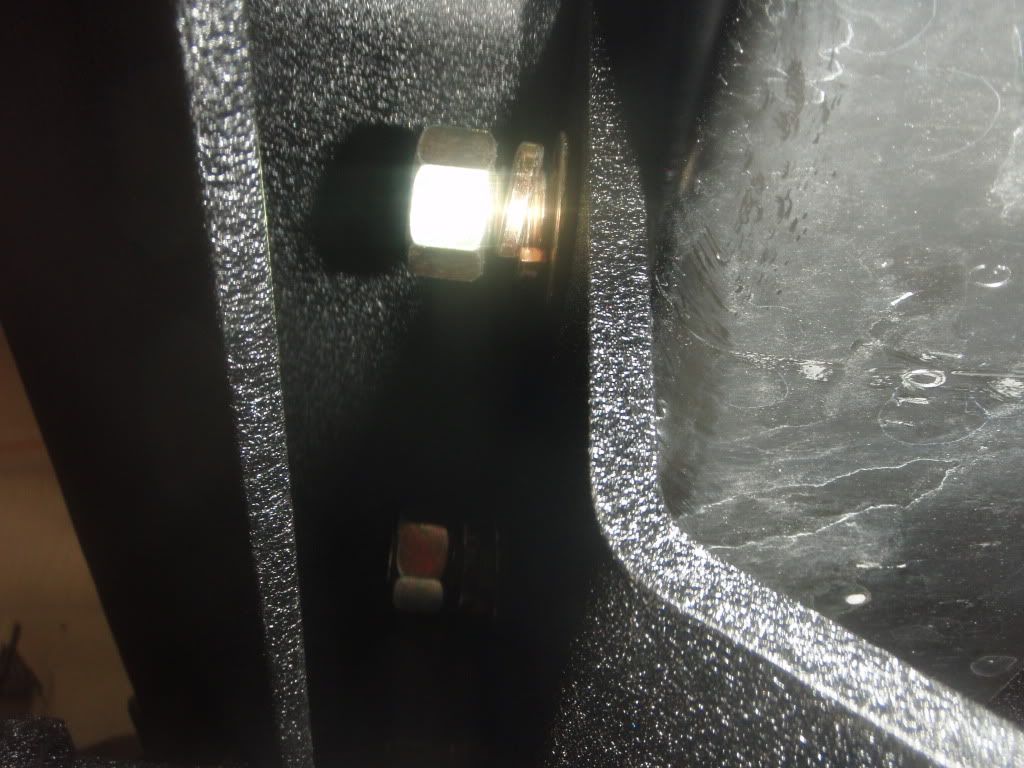
5, Install the 2 bolts on each side of the frame rail for the bumper. Once done level the bumper and tighten down all the bolts

Now its time for the tier carrier.
1, It helps to remove the rear right light so you don't damage it
2, Install the nylon washer, slide the tire carrier on the post,close the gate, add another washer,snap ring,install the two bolts
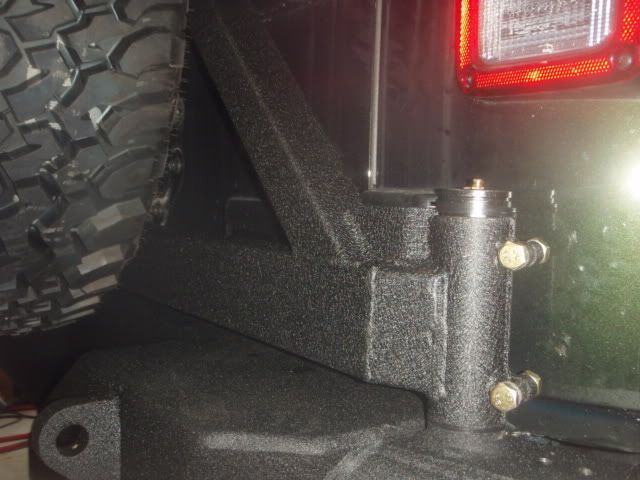
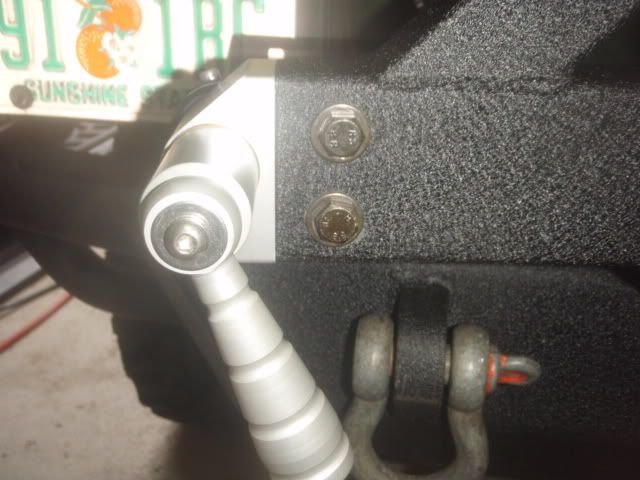
3, Install the handle assembly to the other end and bolt it down.
you might need to make a few adjustments to get the gate to close good .
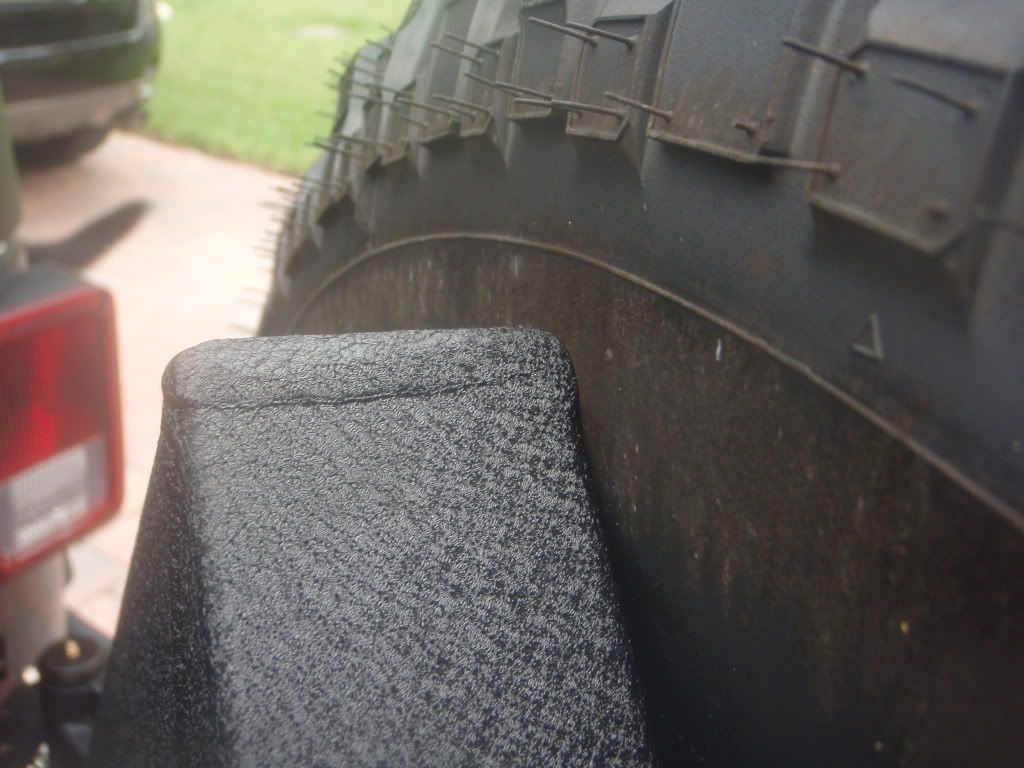
With the tire on I can see its pushing tight agenst the carrier. Thats because of the back spacing of the rim. Some spacer should fix this

Some of the pics did not load up, but I'll try to explain at that point.
1, Remove stock tire carrier and bumper, There are two bolts on each side of the frame rail and two behind the cross rail.
2, Lay out your bolts & washers
3, Remove the stock tow hook and install the backing plate in the left & right frame rails
4, Have your helper ( thanks guys ) hold up the bumper and install the 4 bolts through the bottom on the bumper, do not tighten yet
5, Install the 2 bolts on each side of the frame rail for the bumper. Once done level the bumper and tighten down all the bolts
Now its time for the tier carrier.
1, It helps to remove the rear right light so you don't damage it
2, Install the nylon washer, slide the tire carrier on the post,close the gate, add another washer,snap ring,install the two bolts
3, Install the handle assembly to the other end and bolt it down.
you might need to make a few adjustments to get the gate to close good .
With the tire on I can see its pushing tight agenst the carrier. Thats because of the back spacing of the rim. Some spacer should fix this
#19
- Master Sergeant
-
- Group: Members
- Posts: 50
- Joined: 28-September 10
- Gender:Male
- Location:Copeland, FL
Posted 18 August 2011 - 05:30 AM
Your step by step photo  document is fantastic
document is fantastic
#20
- Commander
-
- Group: GlobalMod
- Posts: 8,692
- Joined: 30-April 03
- Gender:Male
- Location:Davie, FL
Posted 18 August 2011 - 06:40 AM
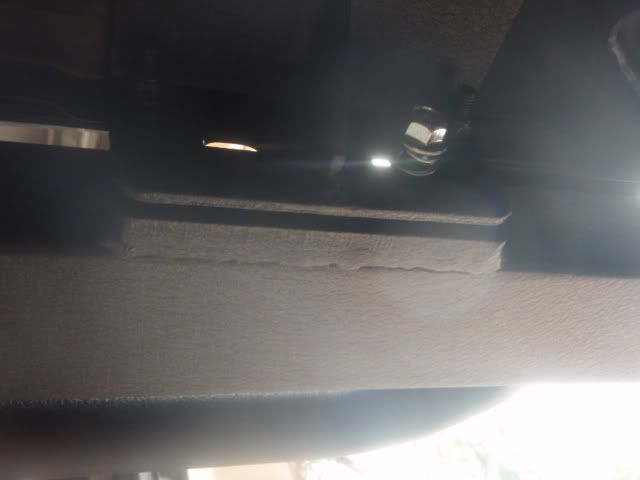
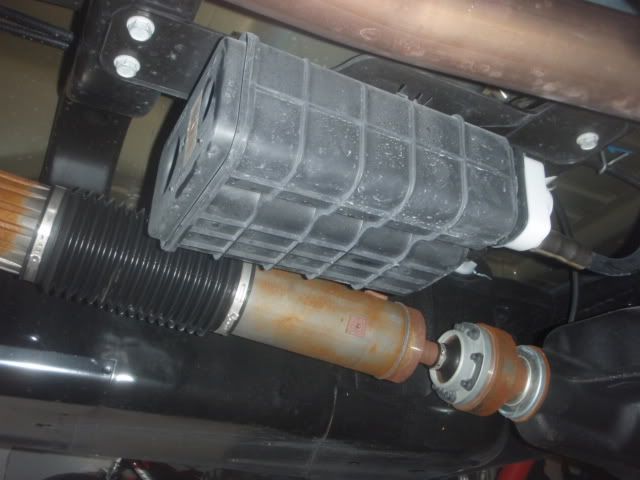
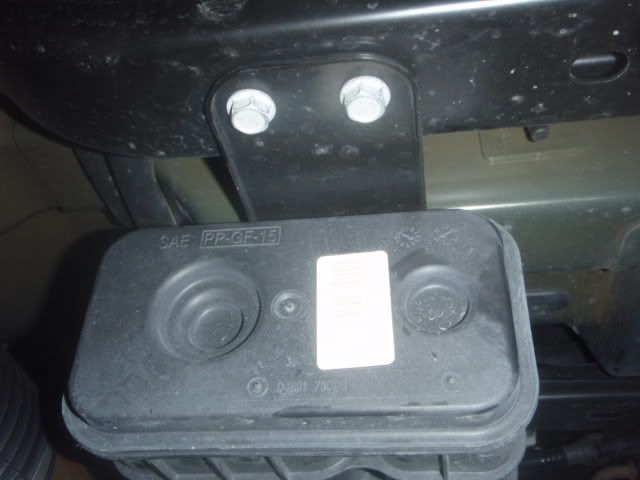
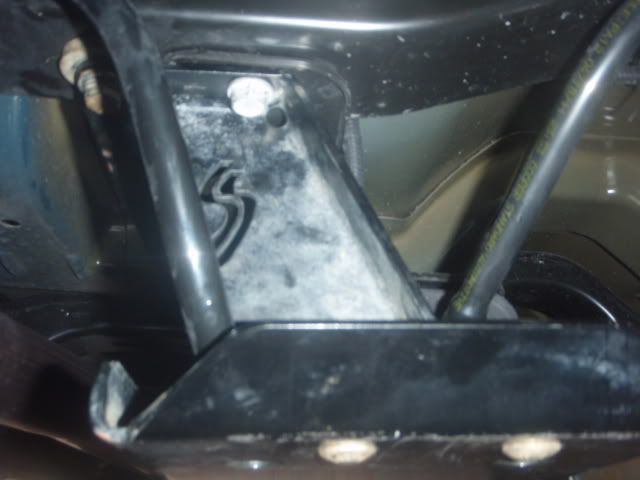
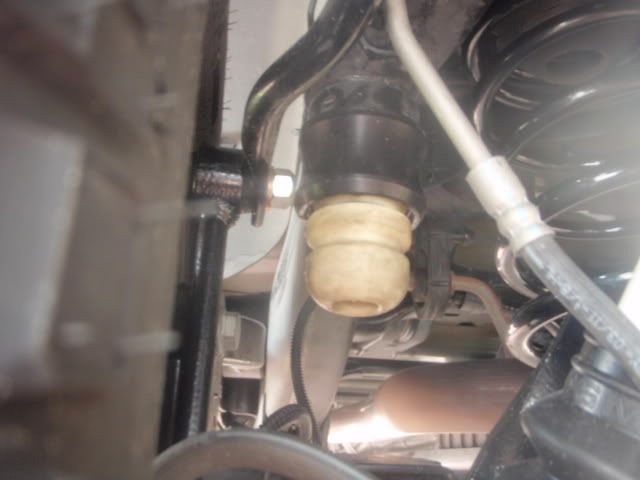
Tommy, have a question on the location of the evaporator.
Is this the location of how it comes OEM or did you relocate
Is this the location of how it comes OEM or did you relocate
El Niño
Experience is defined as something you get, after you need it.
Give the world the best you have. The best will come back to you...
There are no rules for good photographs, there are only good photographs.
"Thou shalt not bear false witness against thy neighbour." 9th Commandment.
"Speak not Evil of the absent for it is unjust." George Washington, Rule 89 of Civility and Decent Behavior.
Wheeling Gallery ----- E-Mail
Life Member: South Florida Jeep Club
#21
- Major
-
- Group: Members
- Posts: 830
- Joined: 15-January 07
- Gender:Male
- Location:Pembroke Pines, Florida
Posted 18 August 2011 - 10:13 AM
Jim, thats where they are but you can relocate them to the rear, somewhere around the axle. This can be done with a kit or on your own.
Thanks sunnyg8tr, I'm trying.
I need to do some things around here, when I'm done I'll check with Mike ( 4 wheel parts )
and see when he thinks we can do the lift there.
Thanks sunnyg8tr, I'm trying.
I need to do some things around here, when I'm done I'll check with Mike ( 4 wheel parts )
and see when he thinks we can do the lift there.
#22
- Commander
-
- Group: GlobalMod
- Posts: 8,692
- Joined: 30-April 03
- Gender:Male
- Location:Davie, FL
Posted 22 August 2011 - 08:29 AM
You would think they would know from factory to put it somewhere else.
Oh well, were would 3rd party companies be if it was not for the bean counters and OEM mistakes.
Oh well, were would 3rd party companies be if it was not for the bean counters and OEM mistakes.
El Niño
Experience is defined as something you get, after you need it.
Give the world the best you have. The best will come back to you...
There are no rules for good photographs, there are only good photographs.
"Thou shalt not bear false witness against thy neighbour." 9th Commandment.
"Speak not Evil of the absent for it is unjust." George Washington, Rule 89 of Civility and Decent Behavior.
Wheeling Gallery ----- E-Mail
Life Member: South Florida Jeep Club
#23

- Brigadier General
-
- Group: GlobalMod
- Posts: 2,570
- Joined: 23-April 07
- Gender:Male
- Location:West Palm Beach, FL
Posted 22 August 2011 - 08:55 AM
 Jim B, on 22 August 2011 - 08:29 AM, said:
You would think they would know from factory to put it somewhere else.
Oh well, were would 3rd party companies be if it was not for the bean counters and OEM mistakes.
Oh well, were would 3rd party companies be if it was not for the bean counters and OEM mistakes.
Don't know about the 4 door JK's but Rich never hit the skid on his evap even though he hit every other part of the undercarriage up in WindRock

#24
- Major
-
- Group: Members
- Posts: 830
- Joined: 15-January 07
- Gender:Male
- Location:Pembroke Pines, Florida
Posted 09 October 2011 - 04:51 PM
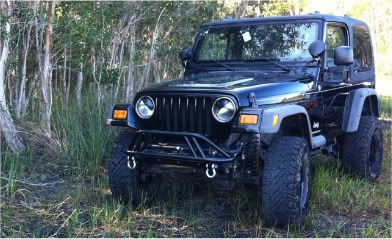
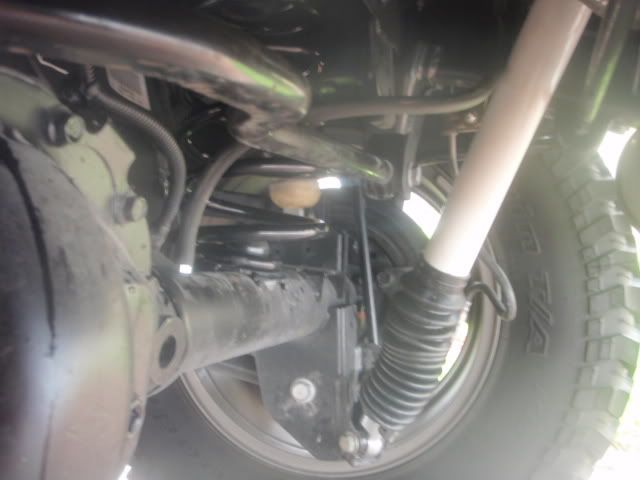
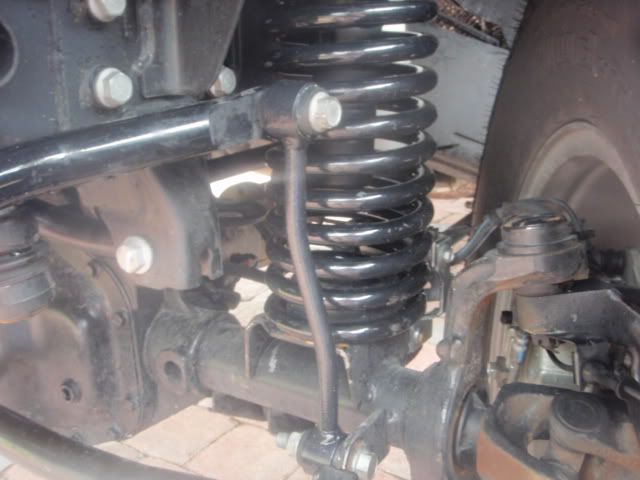
Here's the lift install
Rear
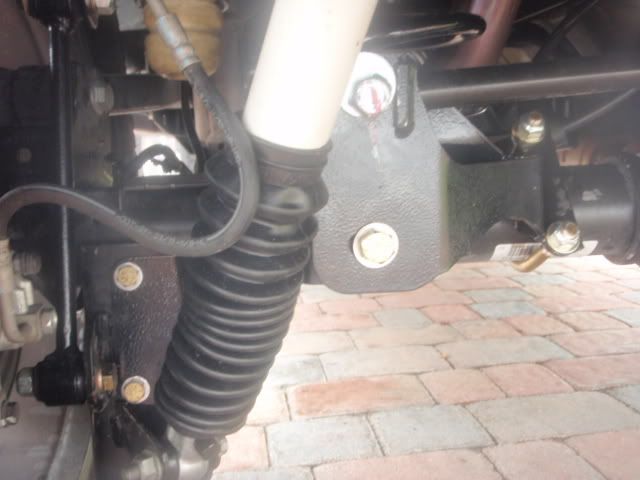
Frount
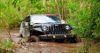
And the jeep on stock tires
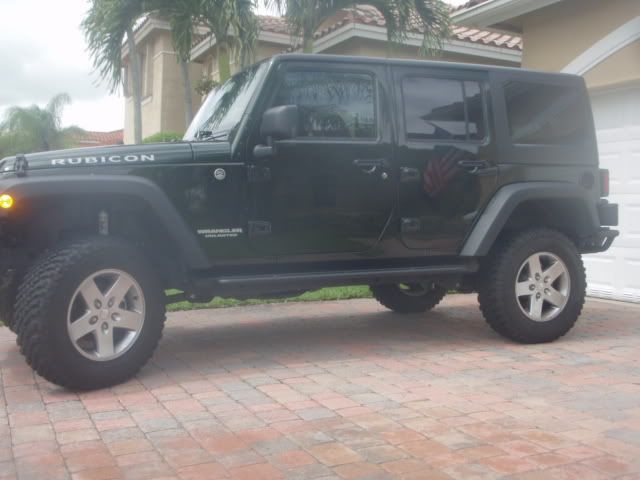
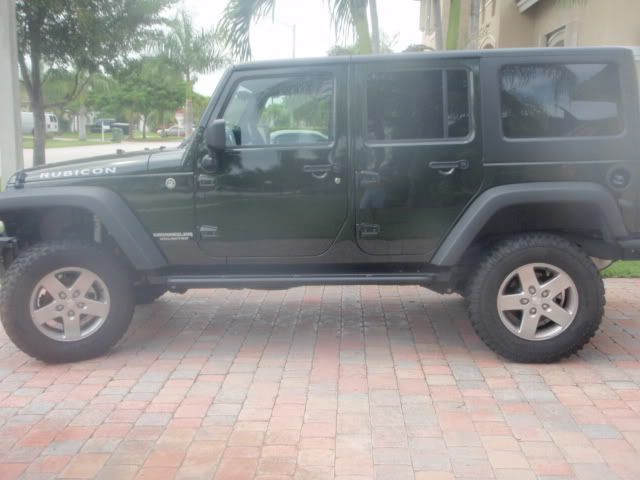
I started around 9:00, by 5:00 I was driving down 75.NO shacks, no shimmy, no DW.Had the jeep up to 85mph ,,smooth.
Some time next week I'll have the 35"s on.
Rear
Frount
And the jeep on stock tires
I started around 9:00, by 5:00 I was driving down 75.NO shacks, no shimmy, no DW.Had the jeep up to 85mph ,,smooth.
Some time next week I'll have the 35"s on.
#25
- Lieutenant Colonel
-
- Group: Members
- Posts: 1,134
- Joined: 23-September 09
- Gender:Male
- Location:Miami, Fl
Posted 09 October 2011 - 07:05 PM
Looks good Tommy! You should be kicking butt at Jeeptober.
1991 YJ 3" SOA, 3" BL, 38.5 boggers, SYE, EB D44/8.8, 4.10s, 1999 4.0 High Output motor, BIG rear bumper, 10K vortex winch w/ wireless remote, Square Headlights plus a few extra
1989 YJ. 2"BL, semi-functional snorkel, little "girlie" tires
2001 F350 7.3L turbo diesel, Square Headlights
2007 Honda Rancher 4x4 27" Vampire tires, Square Headlights
Member: South Florida Jeep Club
FOUNDER: Square Headlight Intense Team
"Right is Right even if no one does it & Wrong is Wrong even if everyone does it."
"NEVER look down on someone unless you are helping them up"
"I'm not smart but I can lift heavy things"
#26
- Commander
-
- Group: GlobalMod
- Posts: 8,692
- Joined: 30-April 03
- Gender:Male
- Location:Davie, FL
Posted 10 October 2011 - 06:37 AM
Working under all that rain. Dedication at it's best.
Are you going to keep the boot covers on the shocks
Dedication at it's best.Are you going to keep the boot covers on the shocks
El Niño
Experience is defined as something you get, after you need it.
Give the world the best you have. The best will come back to you...
There are no rules for good photographs, there are only good photographs.
"Thou shalt not bear false witness against thy neighbour." 9th Commandment.
"Speak not Evil of the absent for it is unjust." George Washington, Rule 89 of Civility and Decent Behavior.
Wheeling Gallery ----- E-Mail
Life Member: South Florida Jeep Club
#27
- Major
-
- Group: Members
- Posts: 830
- Joined: 15-January 07
- Gender:Male
- Location:Pembroke Pines, Florida
Posted 10 October 2011 - 03:36 PM
CrackerJack, Jeeptoberfest couldn't come soon enough. Knowing me I'll baby it until I get a feel for how the jeep acts.
I was in my garage all day Sat, it never did rain over here though,and when it did it was short lived. As for the shock boots I might keep them on. I never had a problem with them on my other jeeps, as long as they were on there tight.
I was in my garage all day Sat, it never did rain over here though,and when it did it was short lived. As for the shock boots I might keep them on. I never had a problem with them on my other jeeps, as long as they were on there tight.
#28
- Brigadier General
-
- Group: Members
- Posts: 3,188
- Joined: 18-May 04
- Gender:Male
- Location:GUAPERIA OFF-ROAD READY PA TU MUNDO
Posted 10 October 2011 - 04:49 PM
Tommy, the JK is looking great! sorry i havent been able to lend a hand.
#29
- Major
-
- Group: Members
- Posts: 830
- Joined: 15-January 07
- Gender:Male
- Location:Pembroke Pines, Florida
Posted 10 October 2011 - 08:28 PM
Thanks, Thats alright about the help. I understand everyone has their own lives to tend to first. 
#30
- Brigadier General
-
- Group: Members
- Posts: 3,188
- Joined: 18-May 04
- Gender:Male
- Location:GUAPERIA OFF-ROAD READY PA TU MUNDO
Posted 11 October 2011 - 02:33 PM
im free this afternoon-night if u got something else to install....


